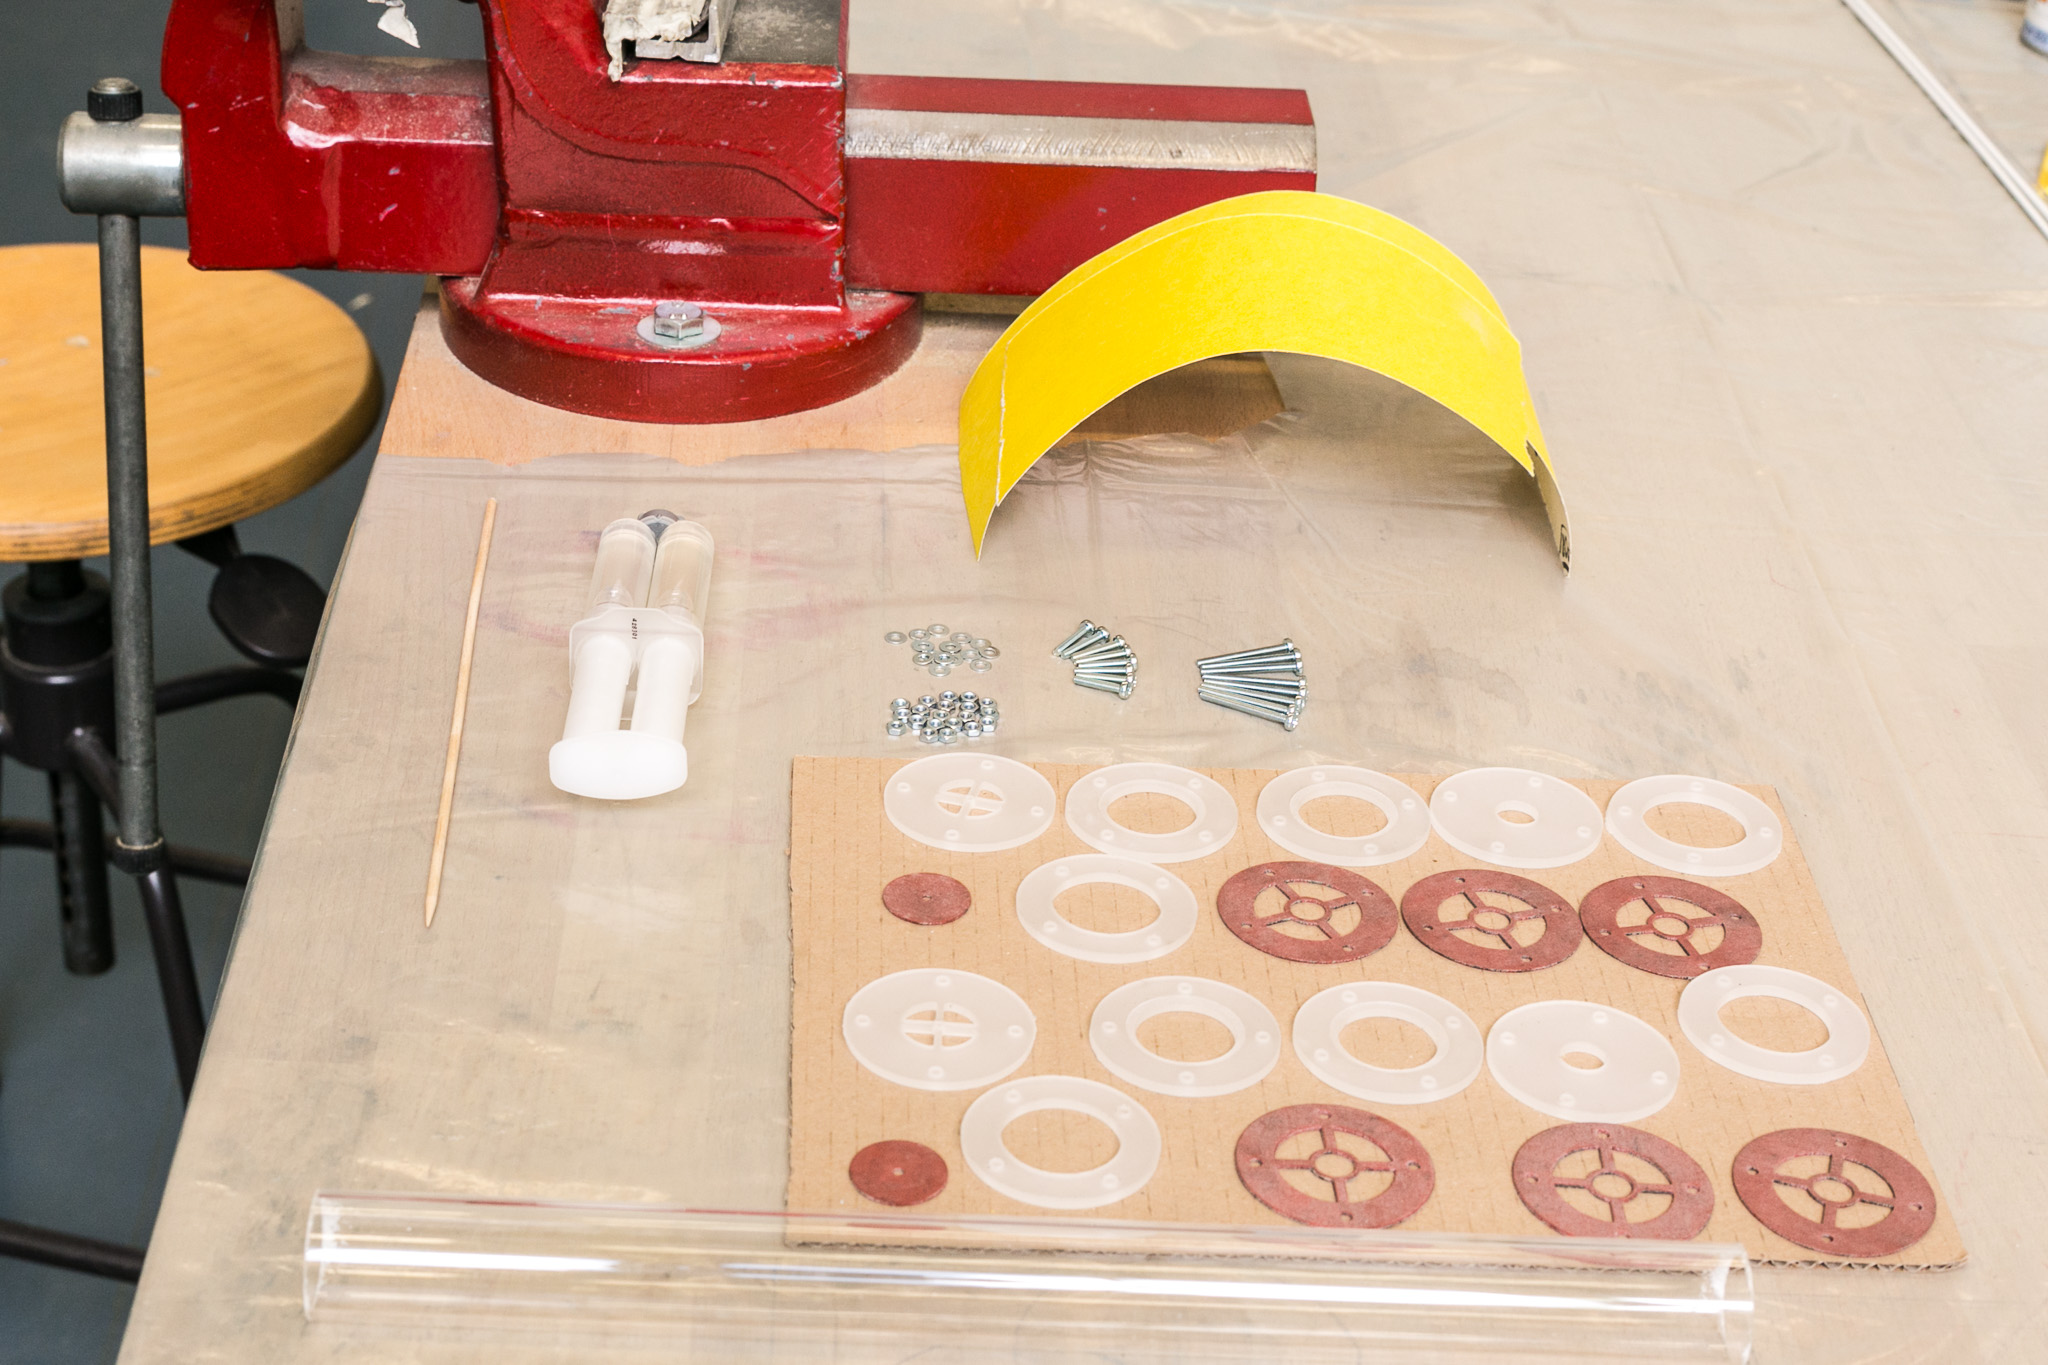
Materials
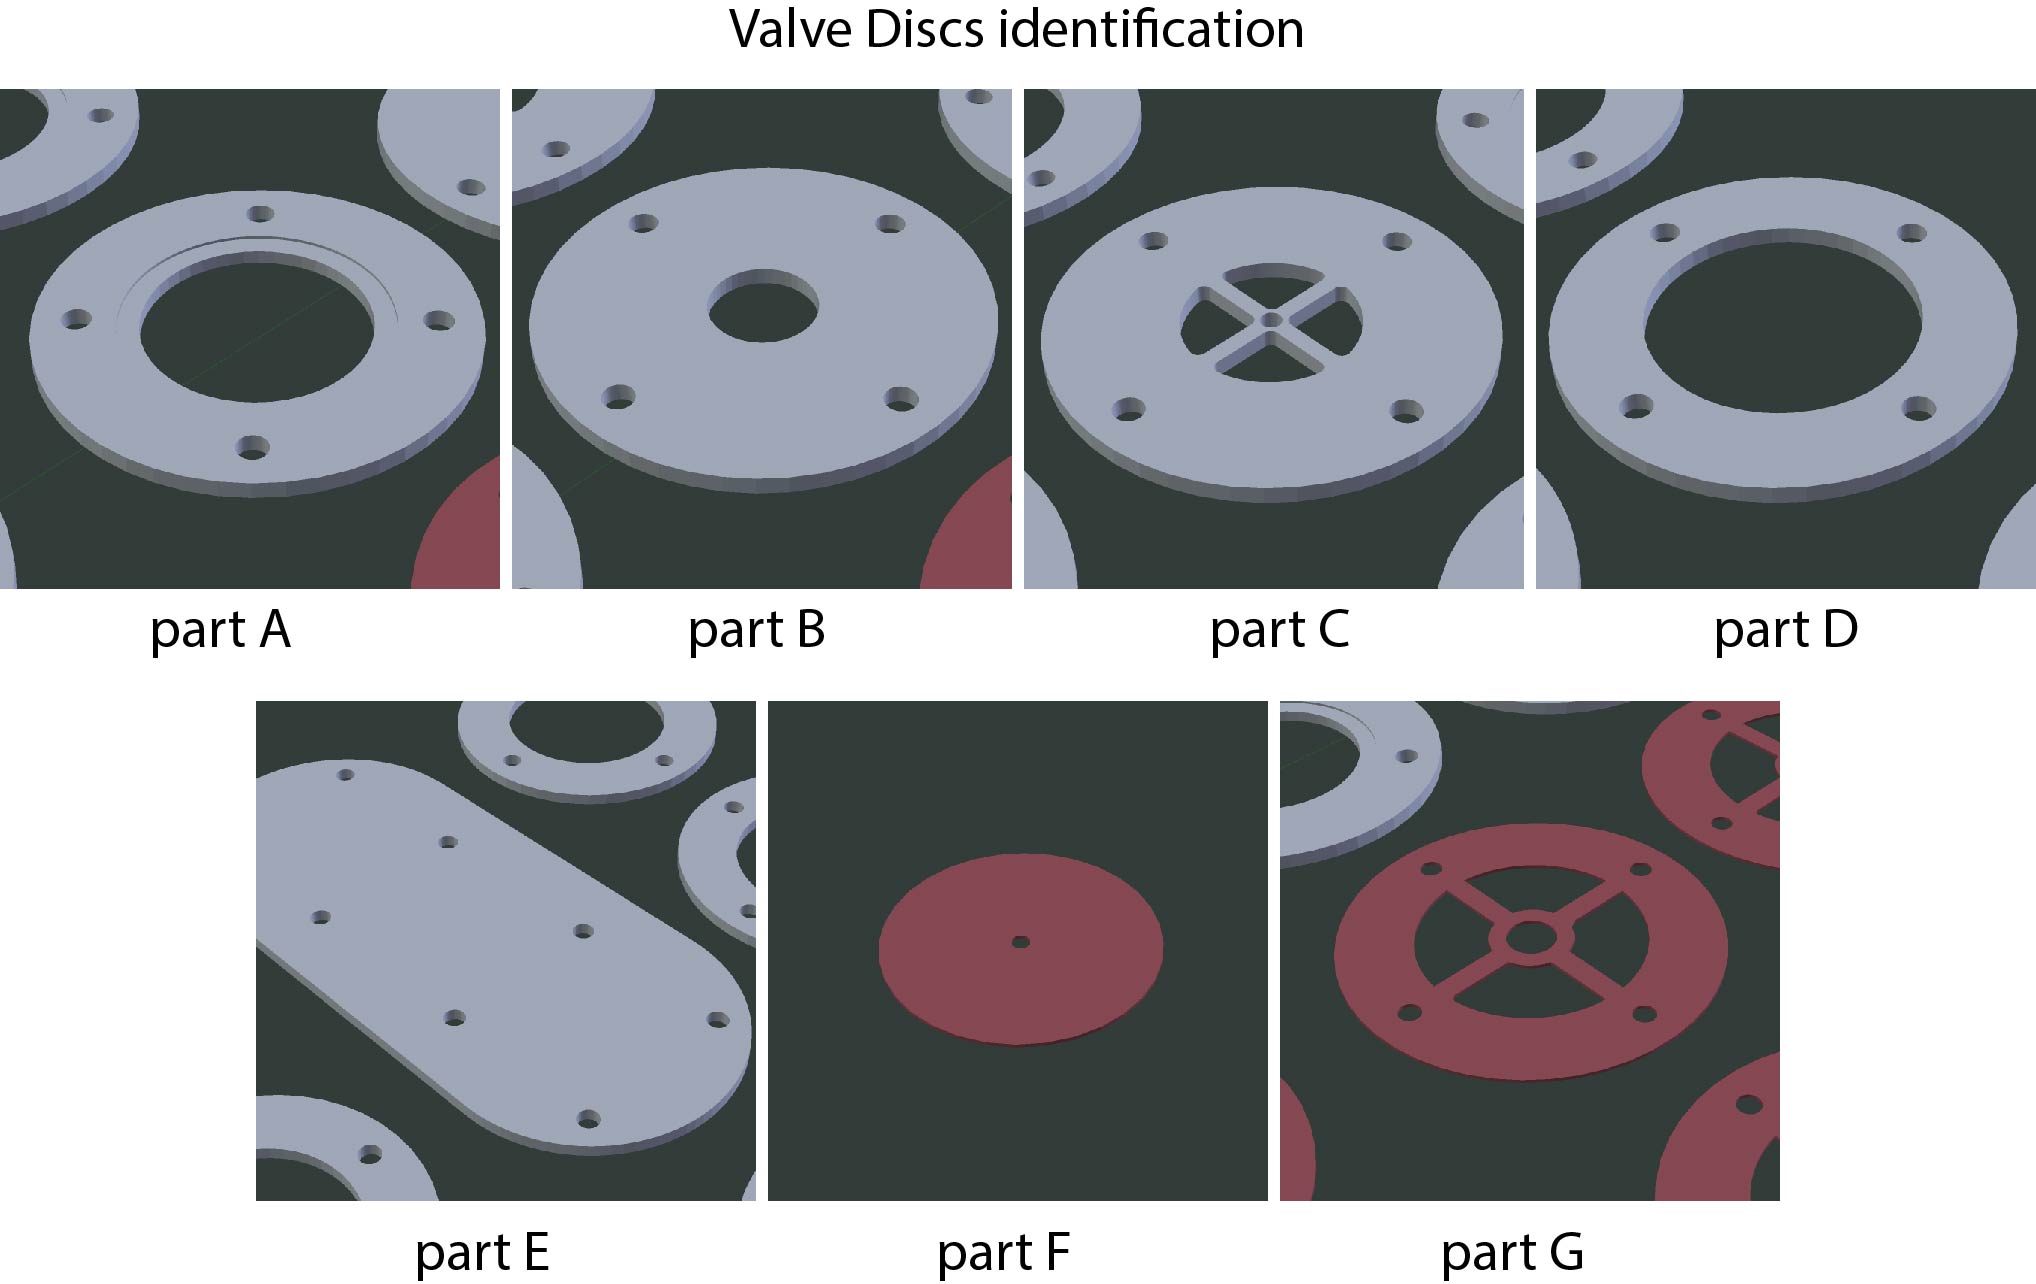 identify parts by name
End Result
Tube preparation
If available, use a bandsaw with a fine saw blade usually used for cutting metal. Alternatively, saw the pieces by hand.
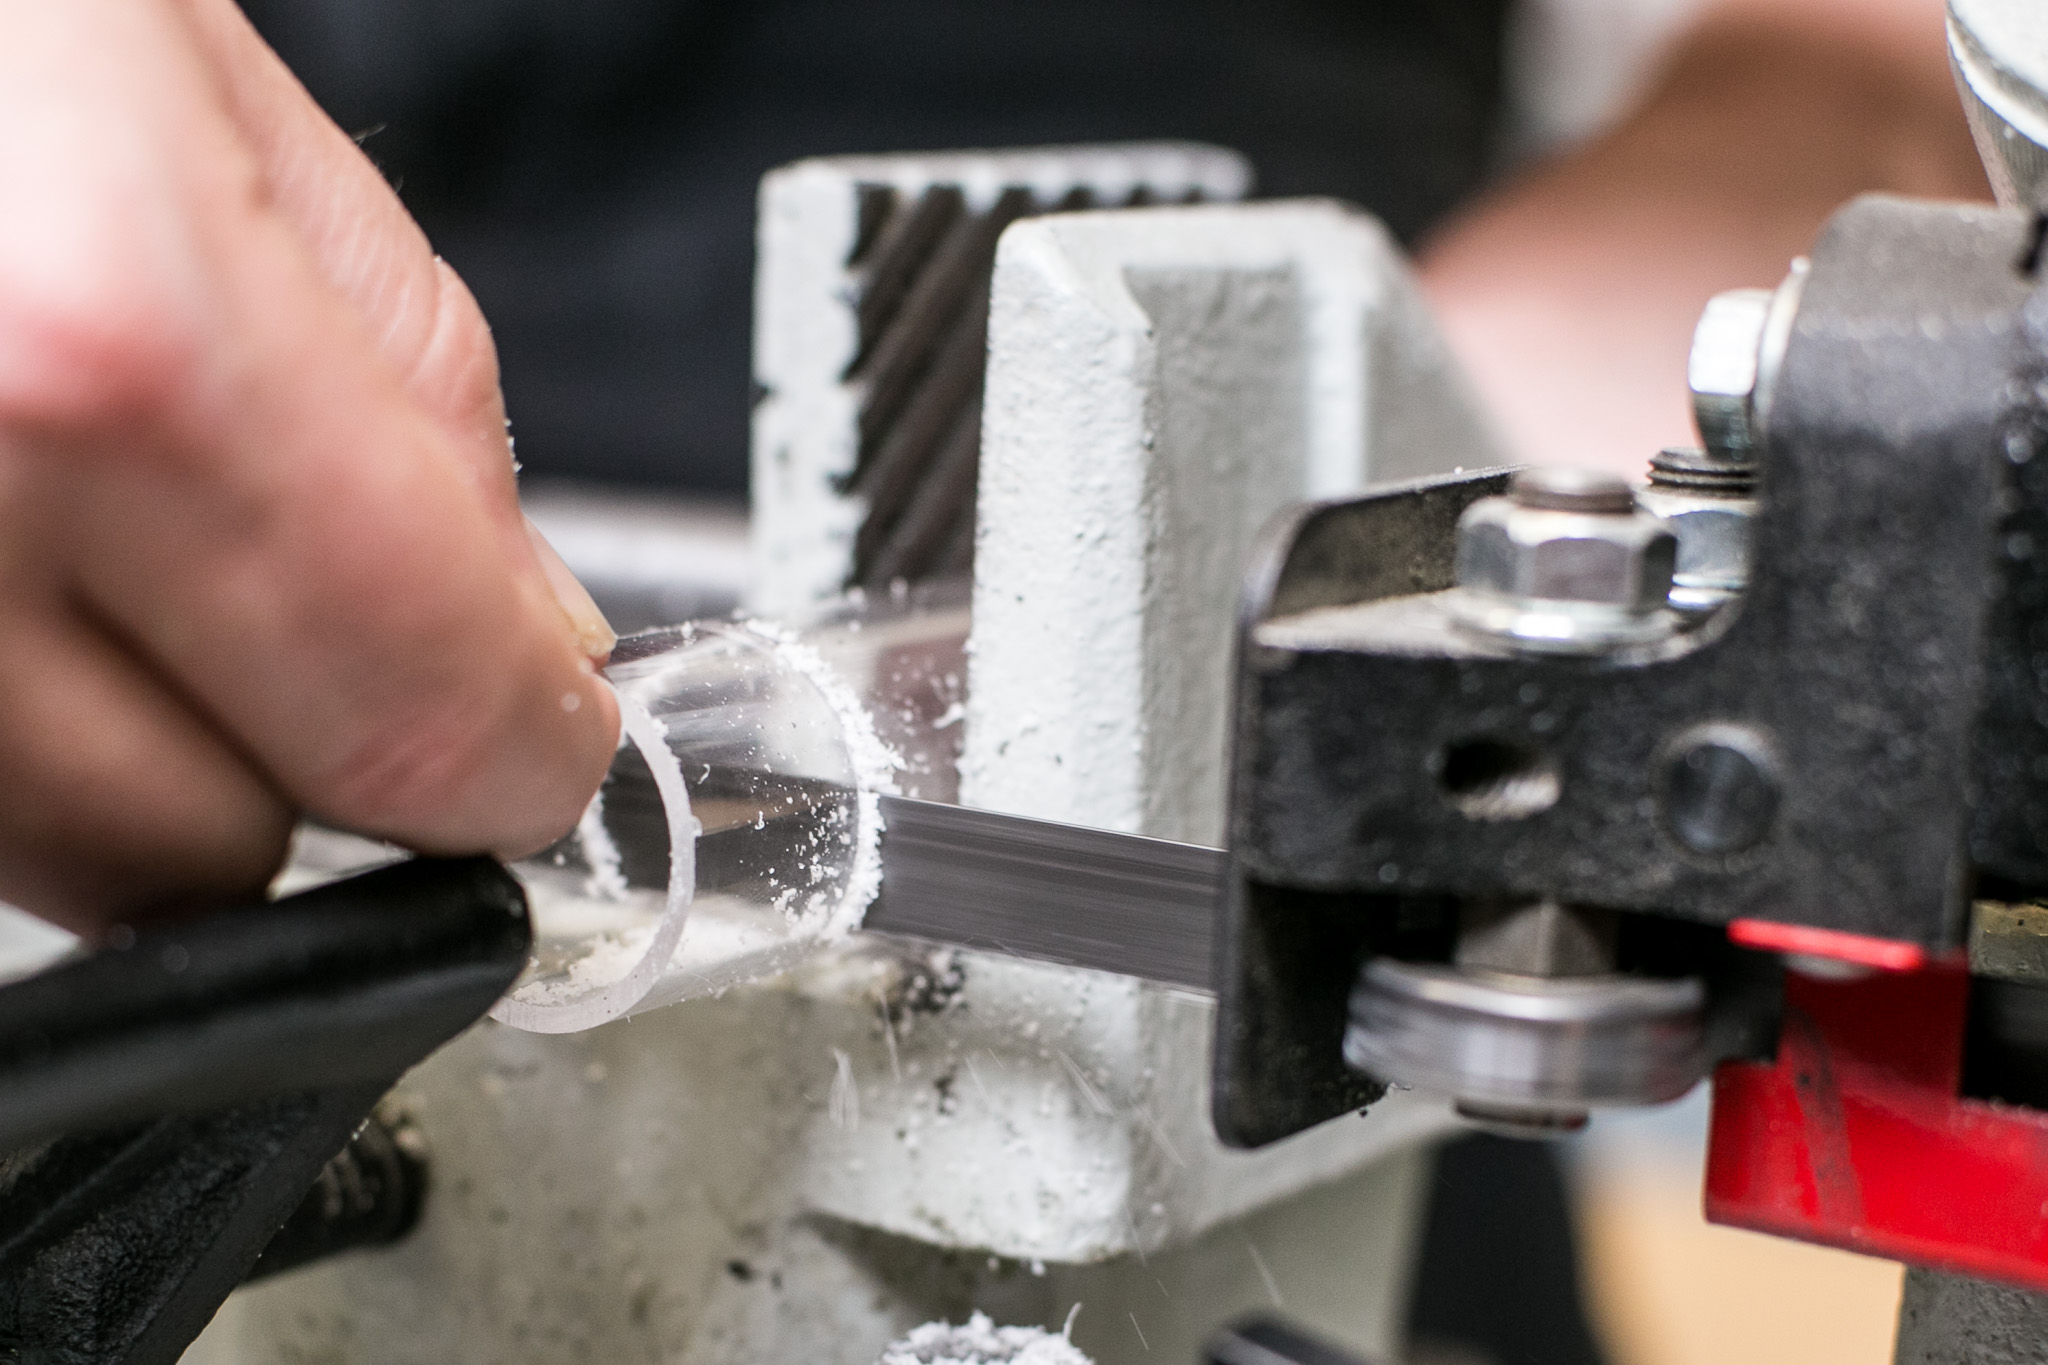
Fix the tube into a vise close to the cutting edge.
Adjust the speed of the bandsaw to be slow
+ cut two pieces off the tube each with a lenght of about 20mm
 Cut acrylic tube.
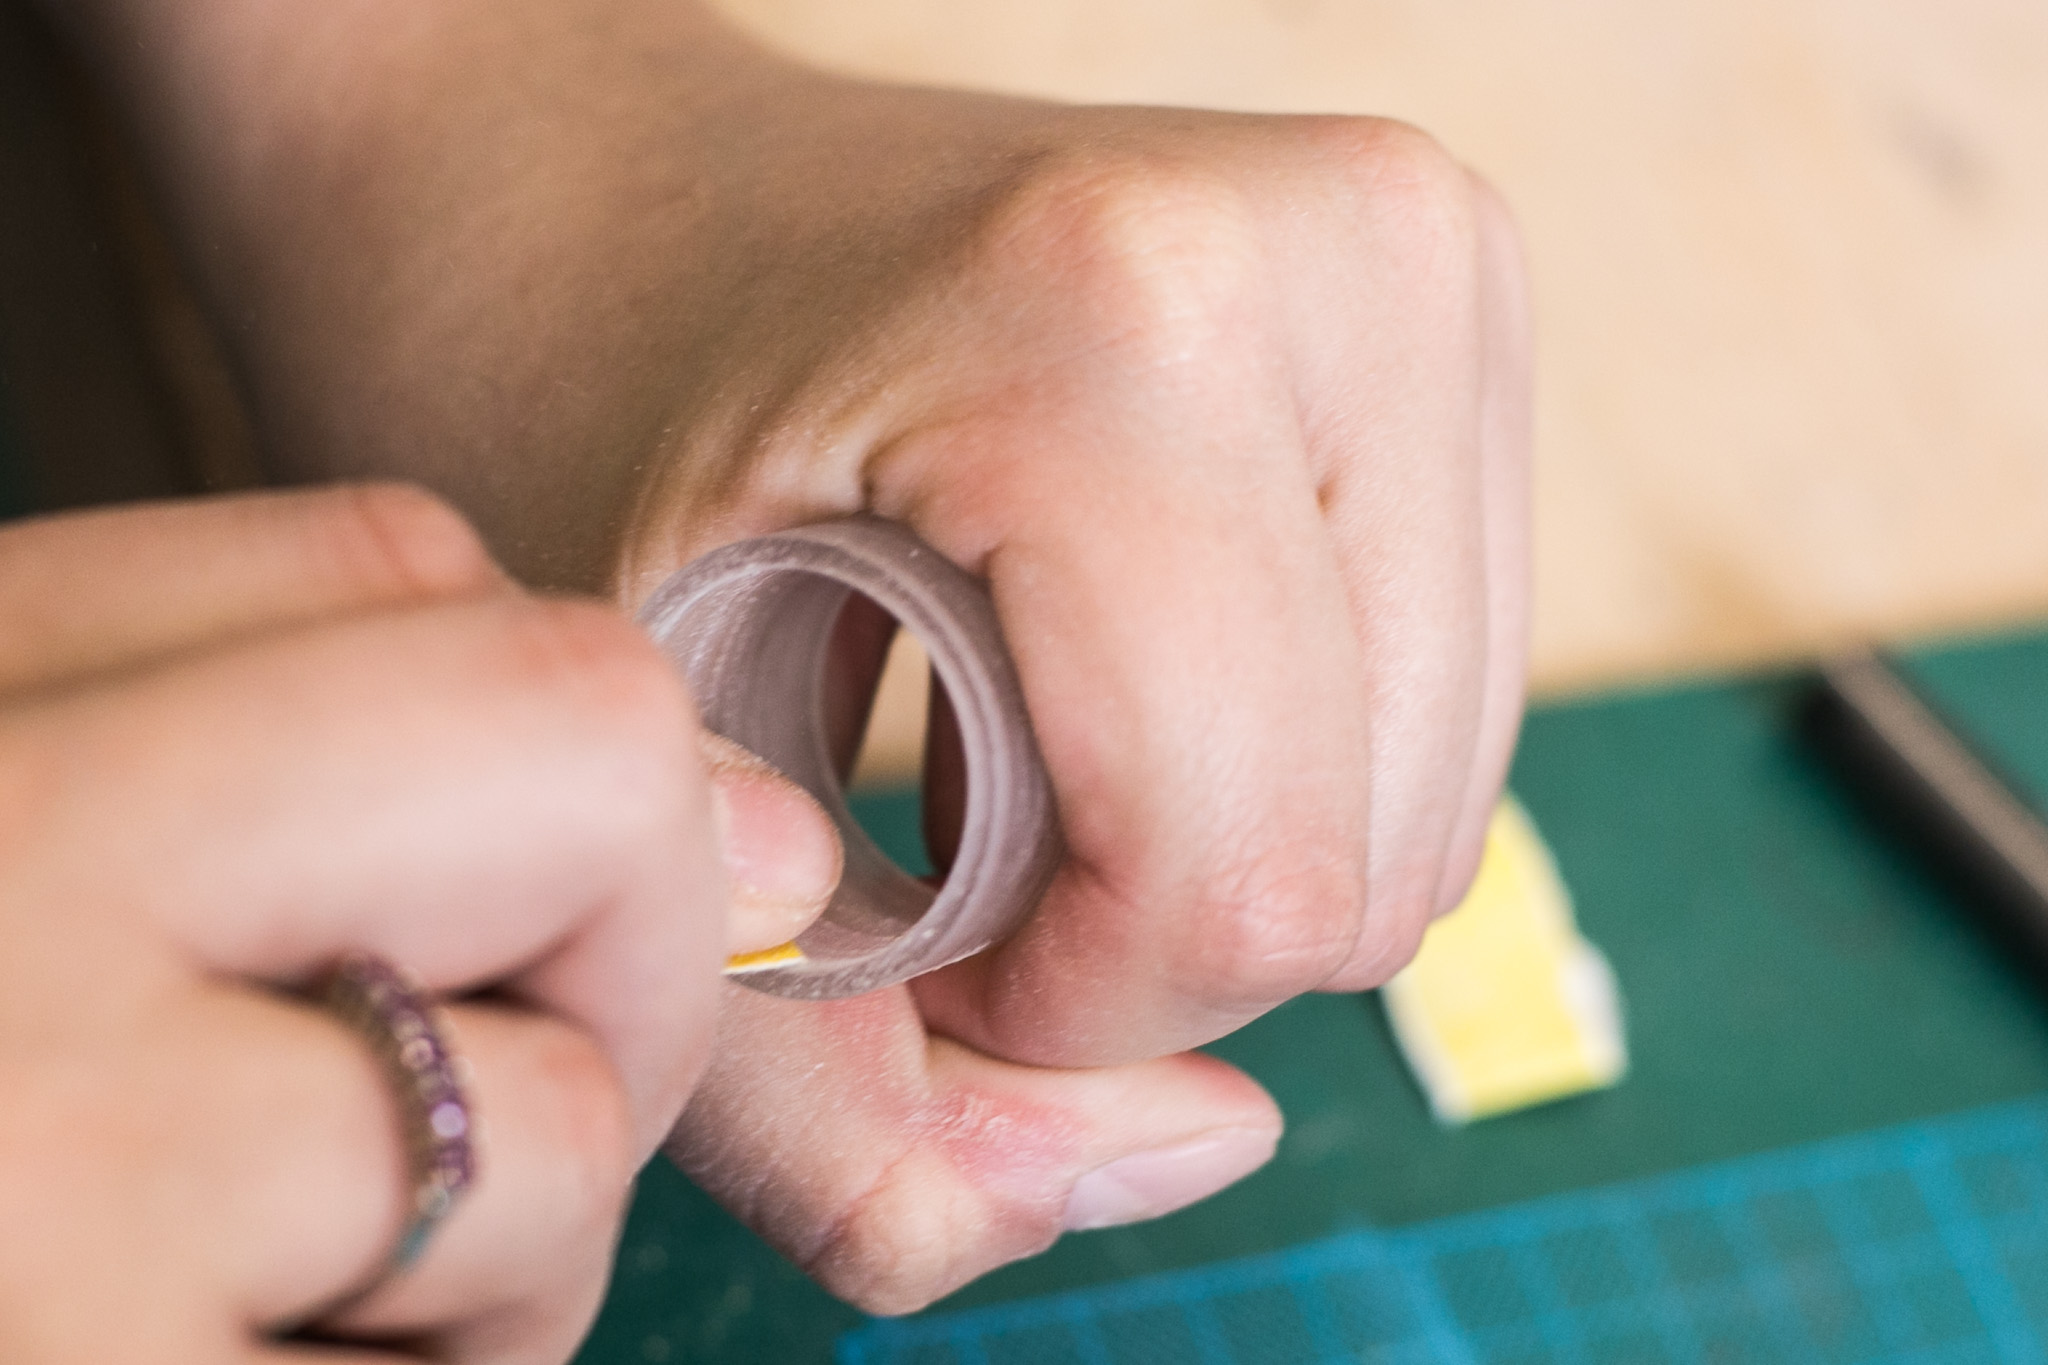 To prepare for glueing, use sand paper to roughen the tubes.
Glueing
Sand the flanges (part A) around glueing area.
Check if the tubes fit into the gaps of the flanges, otherwise sand them down slightly to make them fit on both ends.
Clean up all parts before glueing.
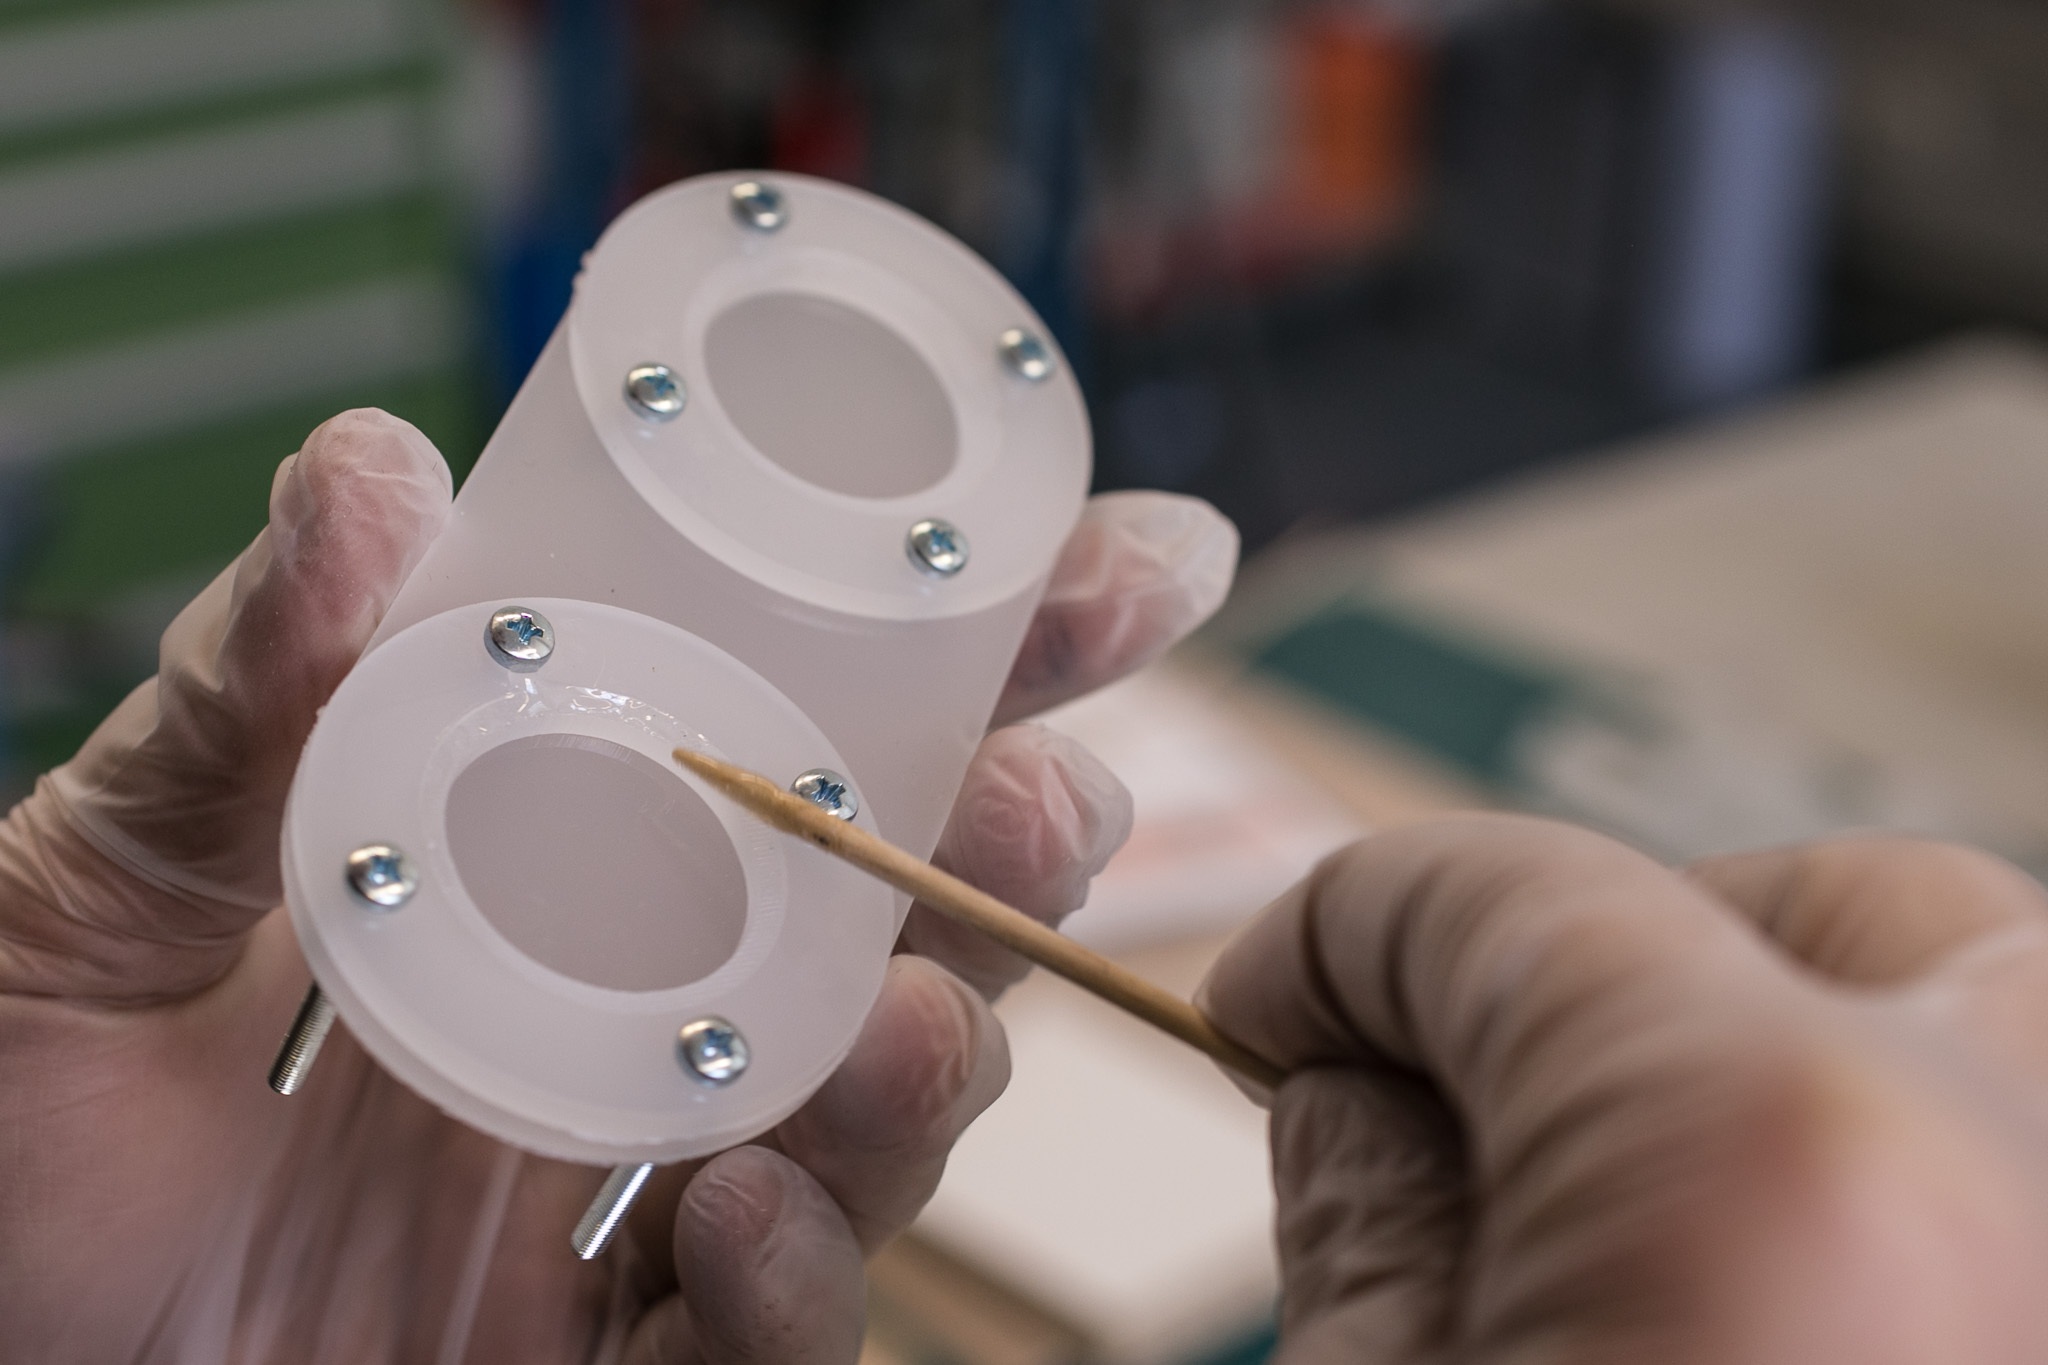
Apply epoxy glue to the gaps of the flange with a toothpick.
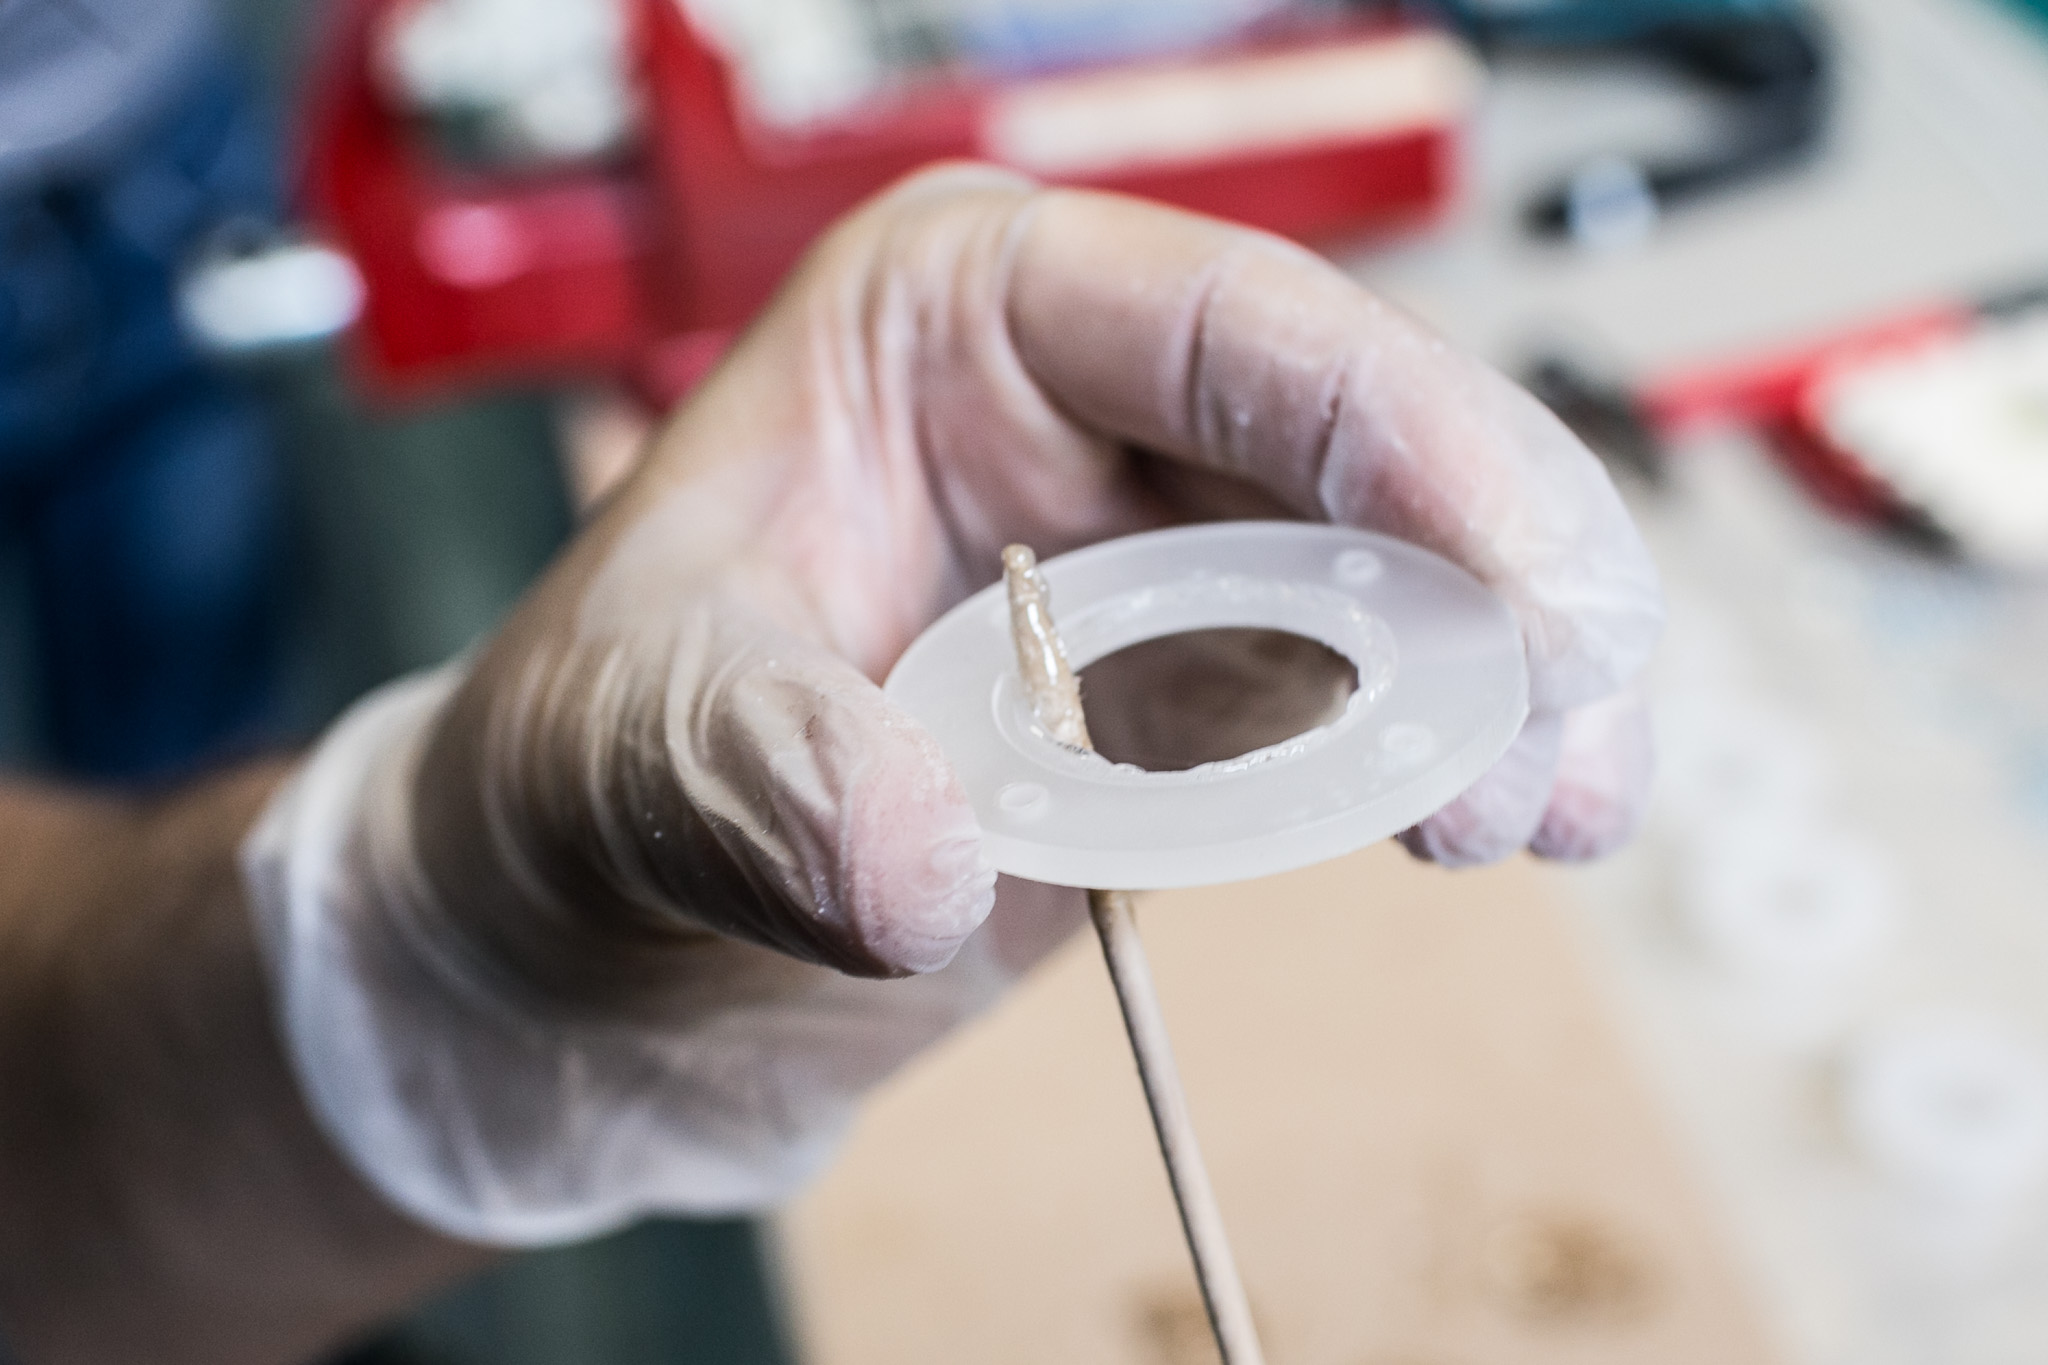 Apply epoxy glue to the gaps of the flange.
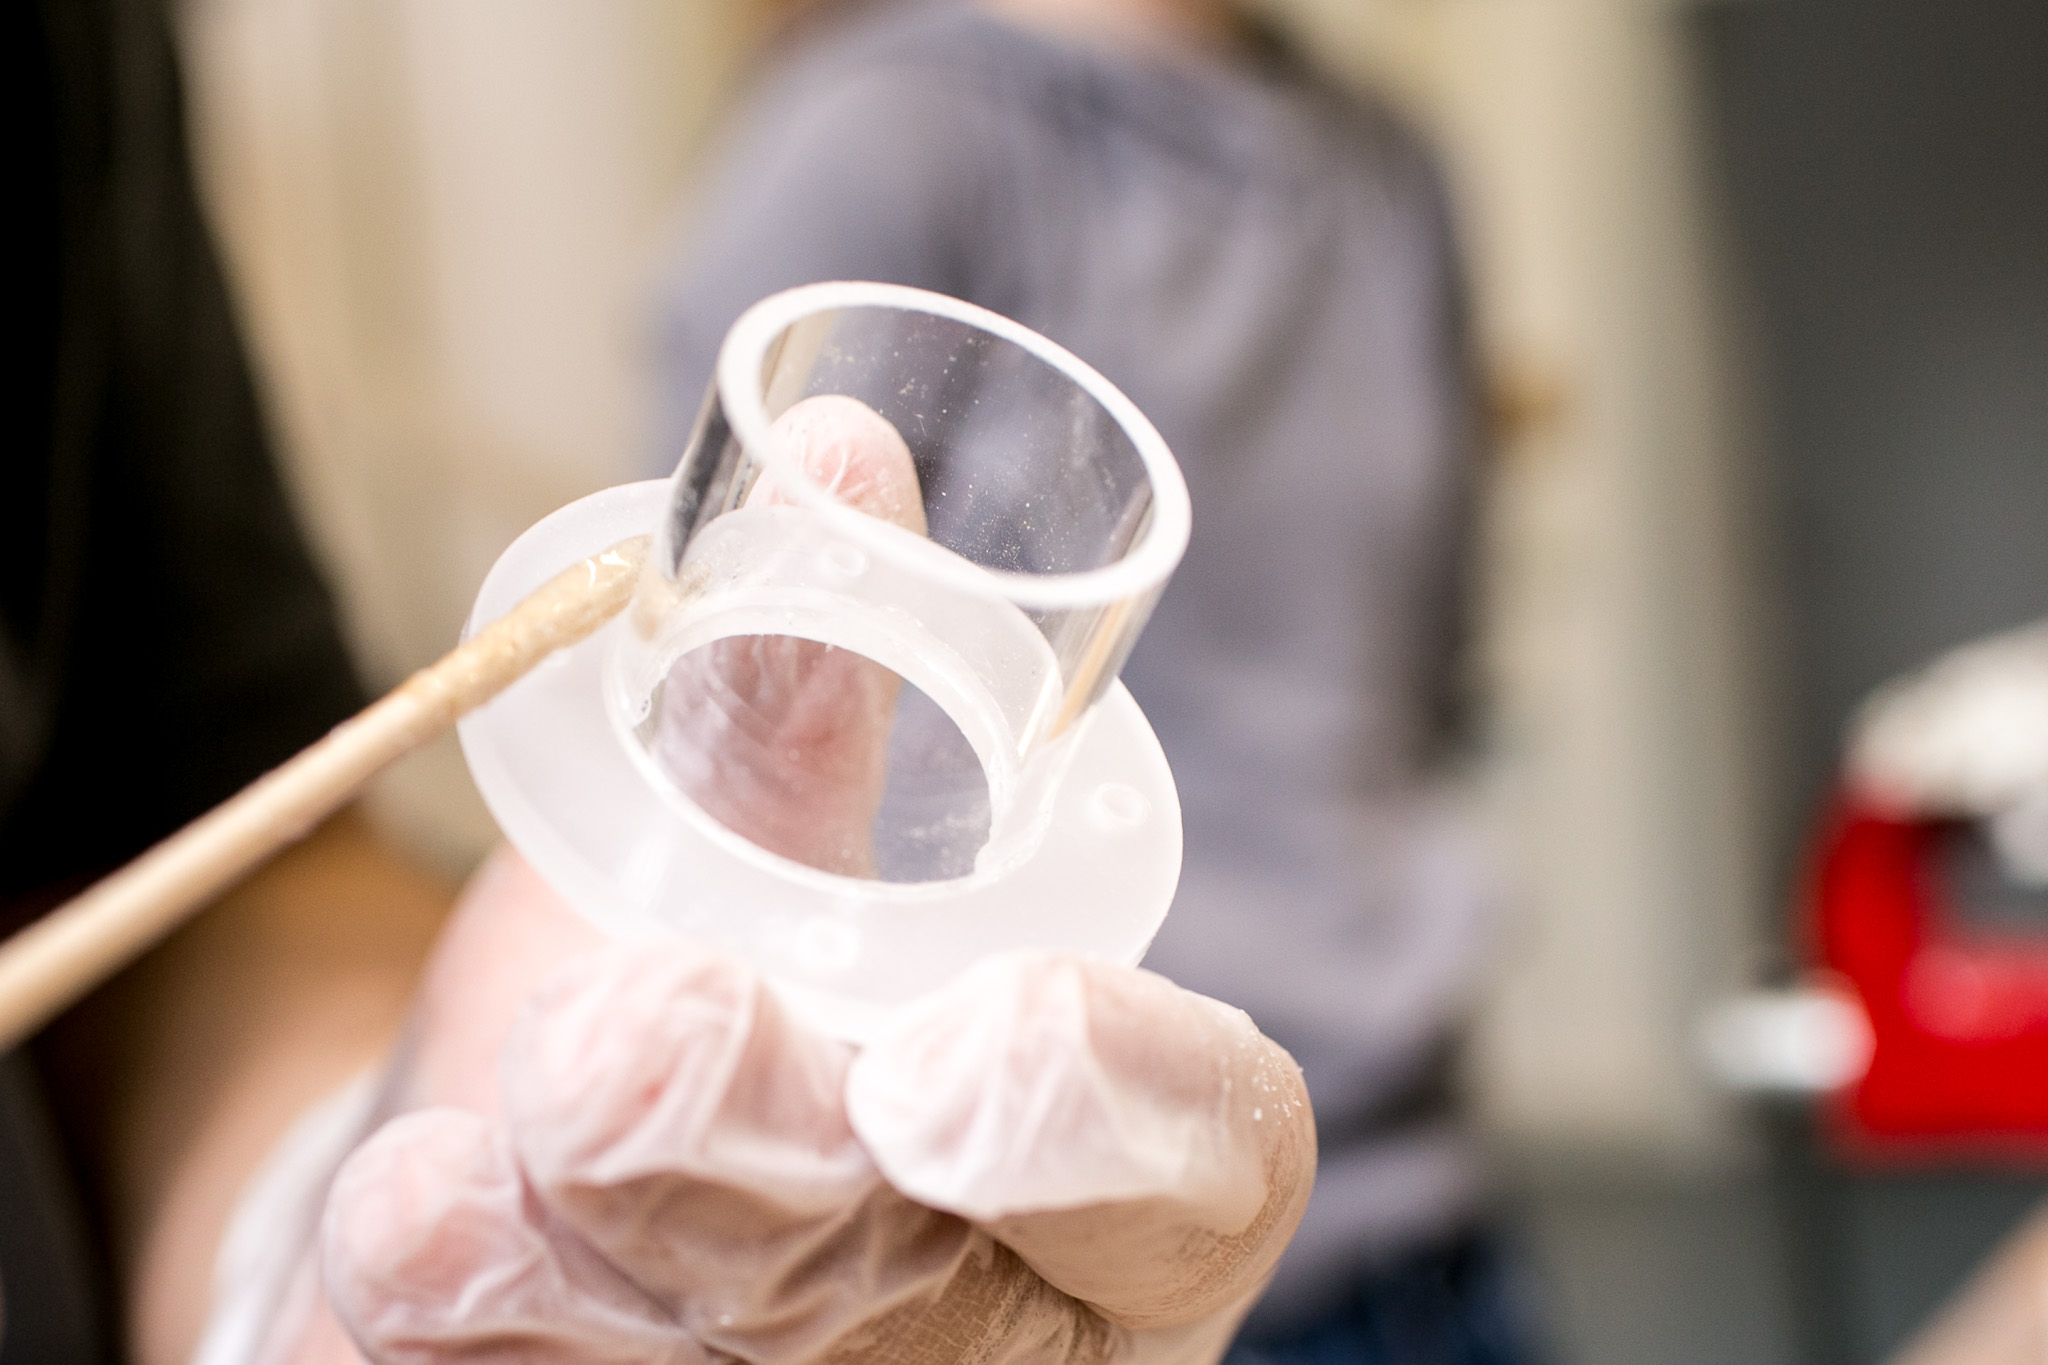 Fit tubes into gaps and apply another batch of glue around them.
Remove all excess glue from the inside of the tubes before it gets solid.
Wait until the glue is solid before continuing with the next steps.
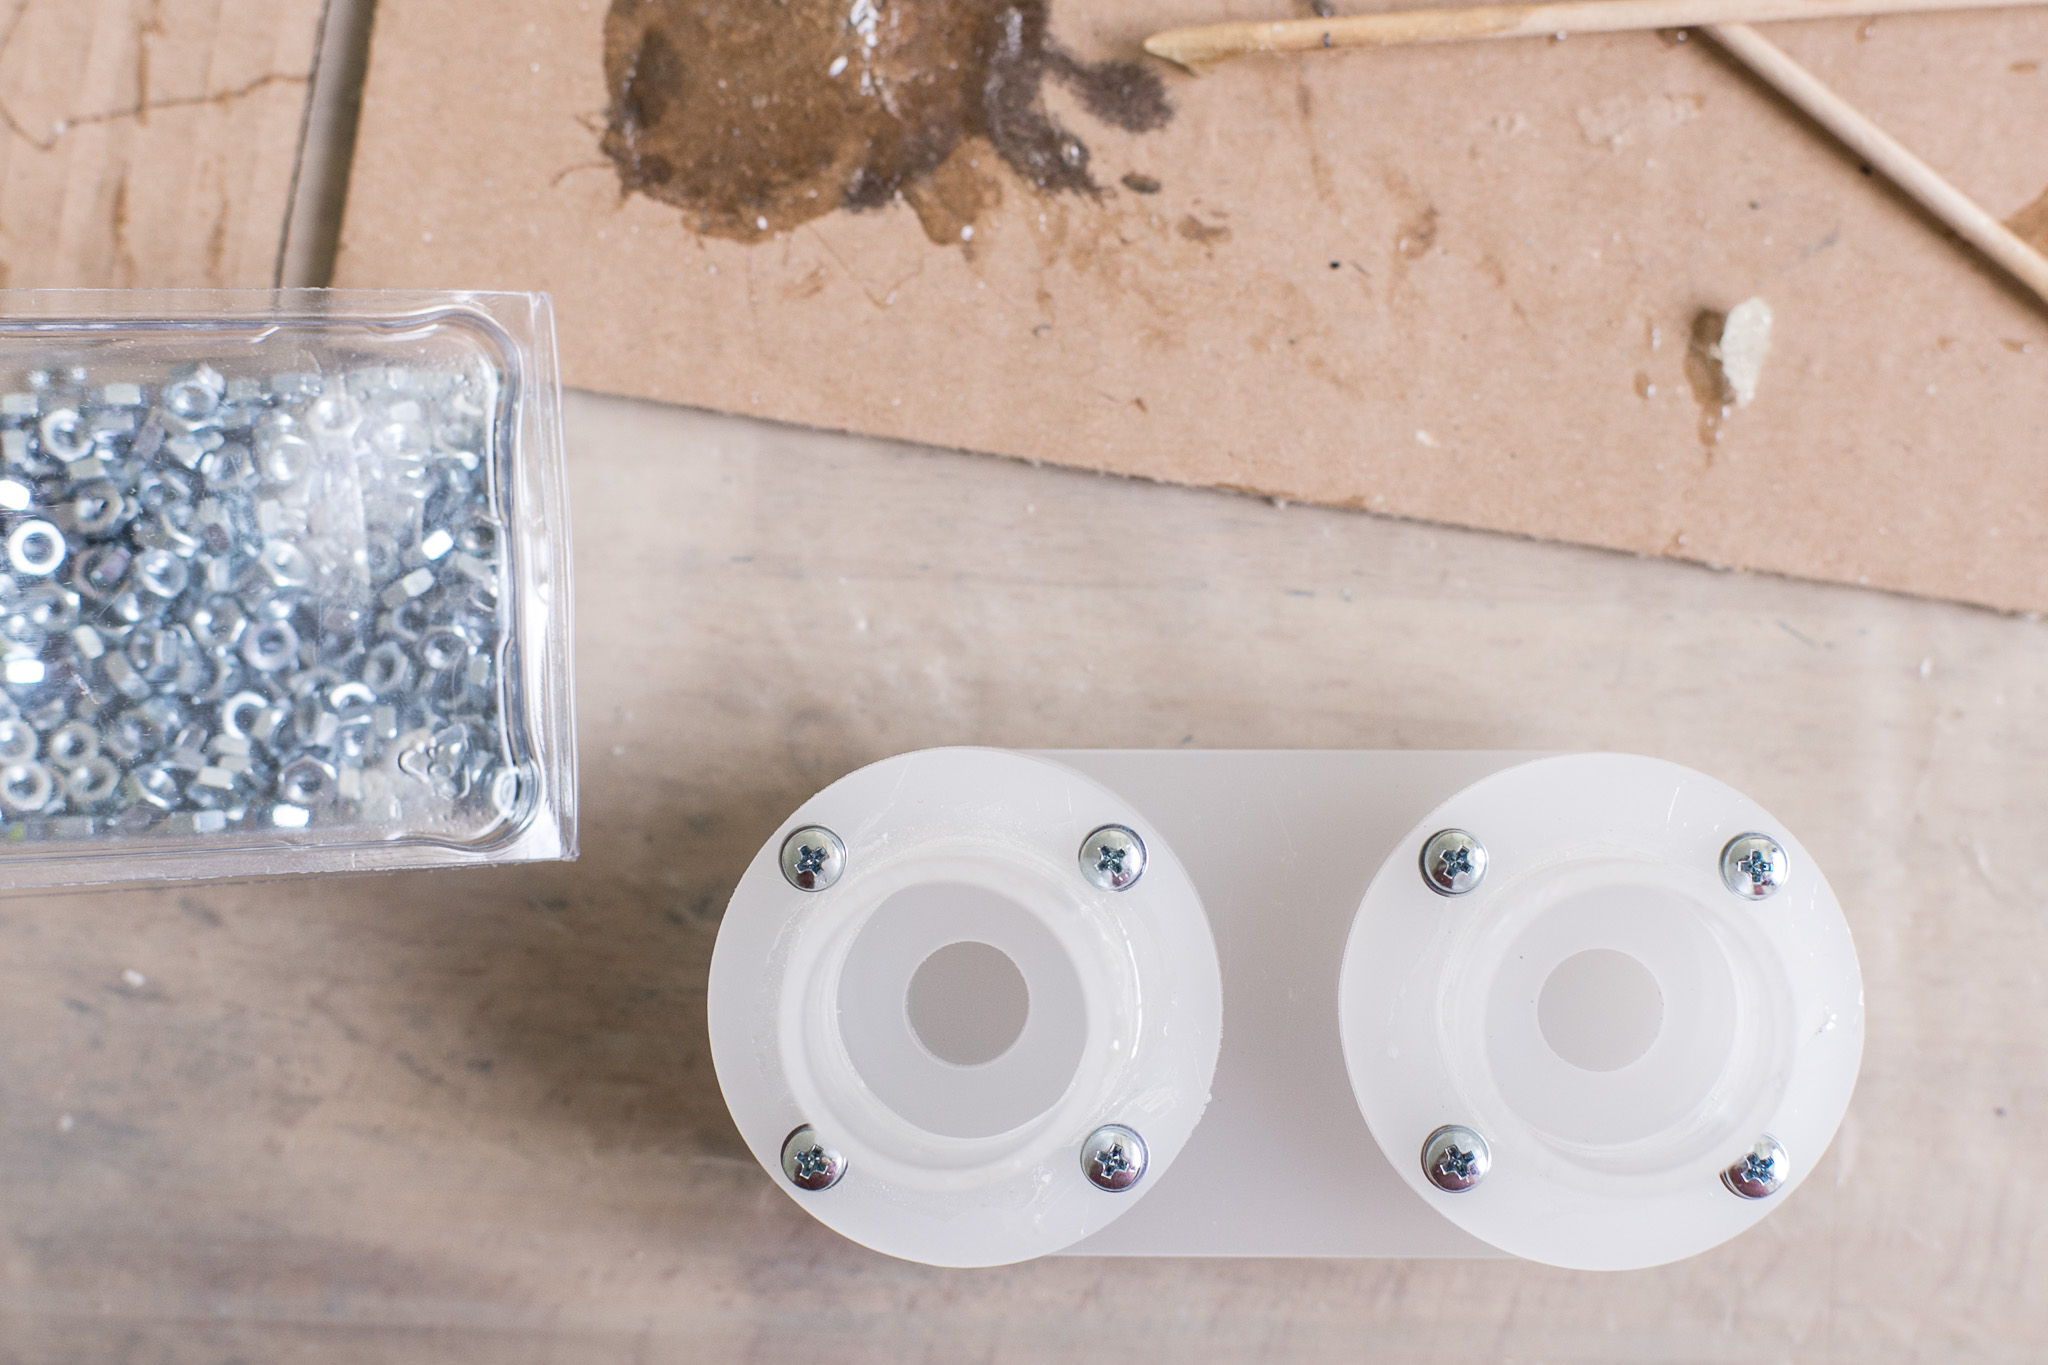
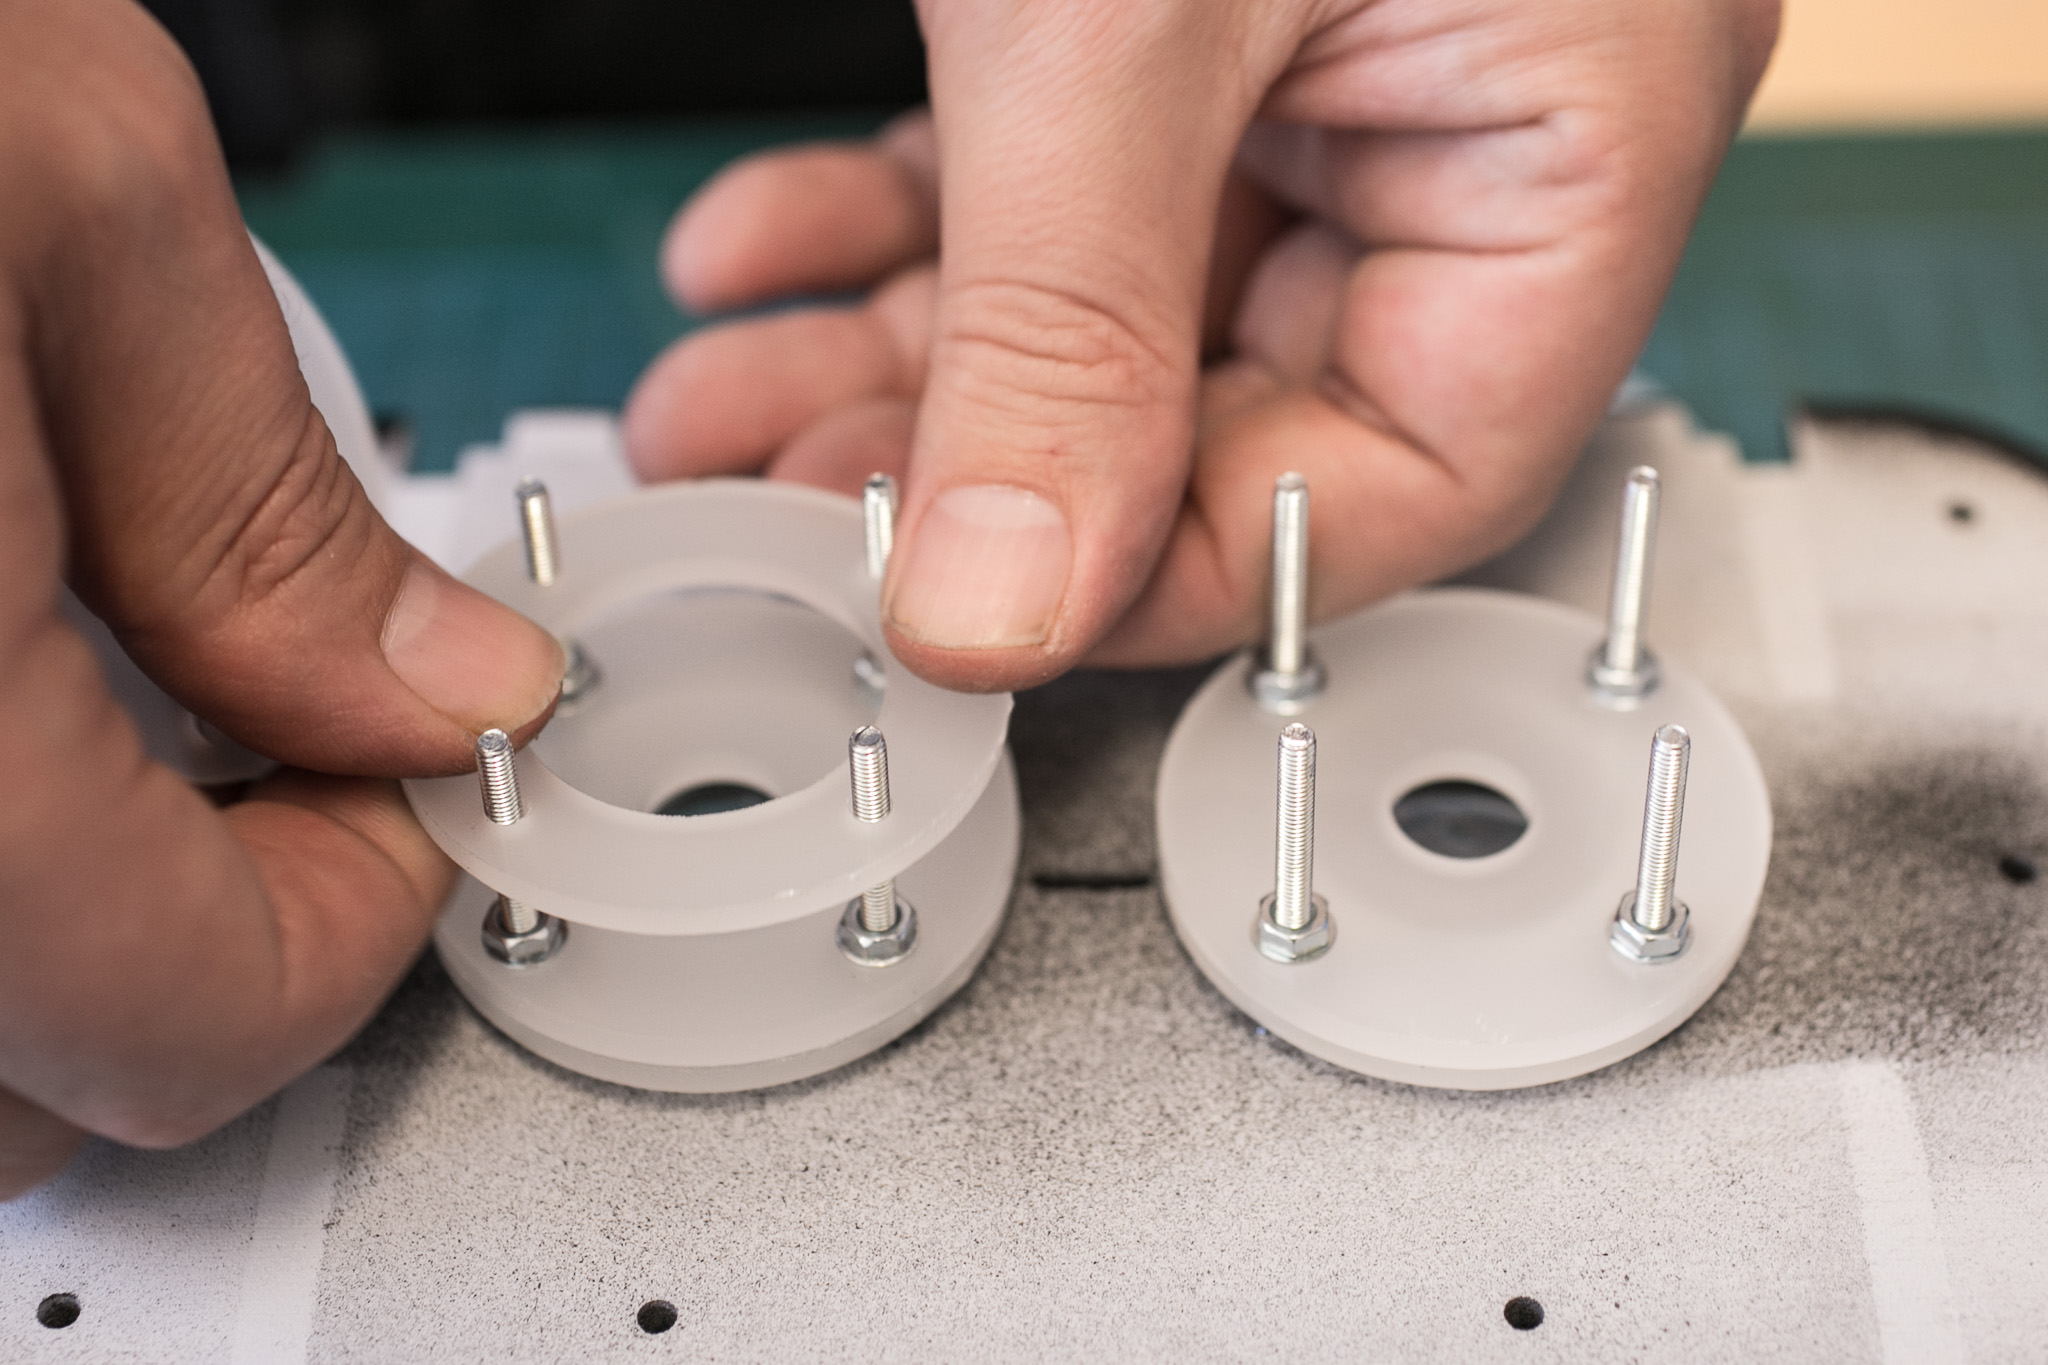
Take 4 screws, 4 screw nuts and 8 washers for each of the two tubes.
Put the screws through the holes of the flanges so that they point away from the tubes. put washers below.
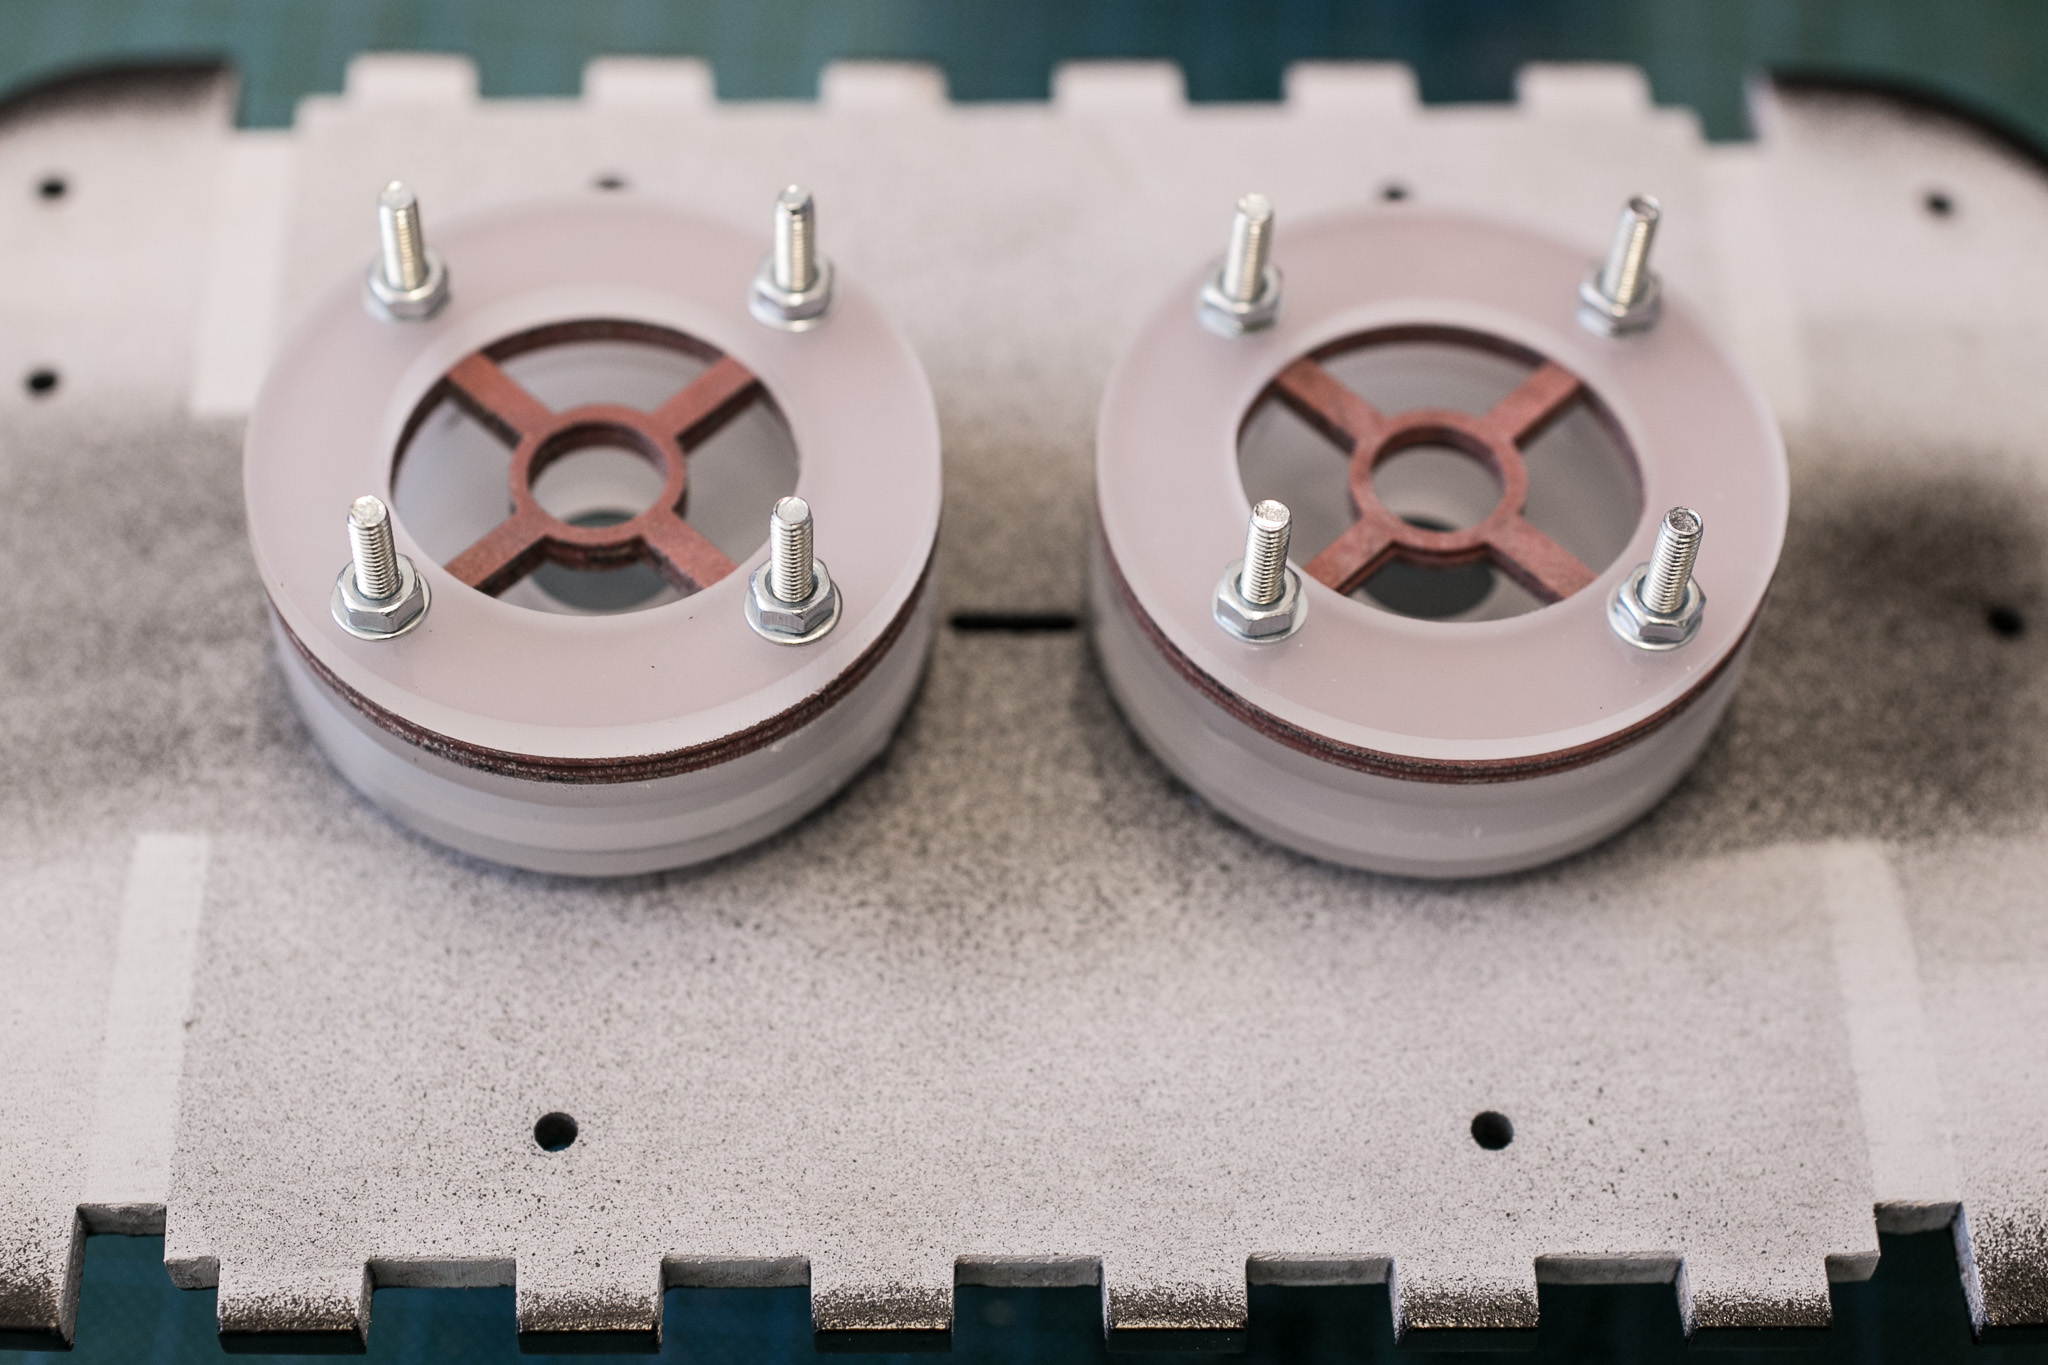
Take an outlet disk (part B) for each tube and mount it to the flanges using screw nuts and washers.
Make sure that the screw nuts have a tight connection. you will not be able to tighten or loosen these later on.
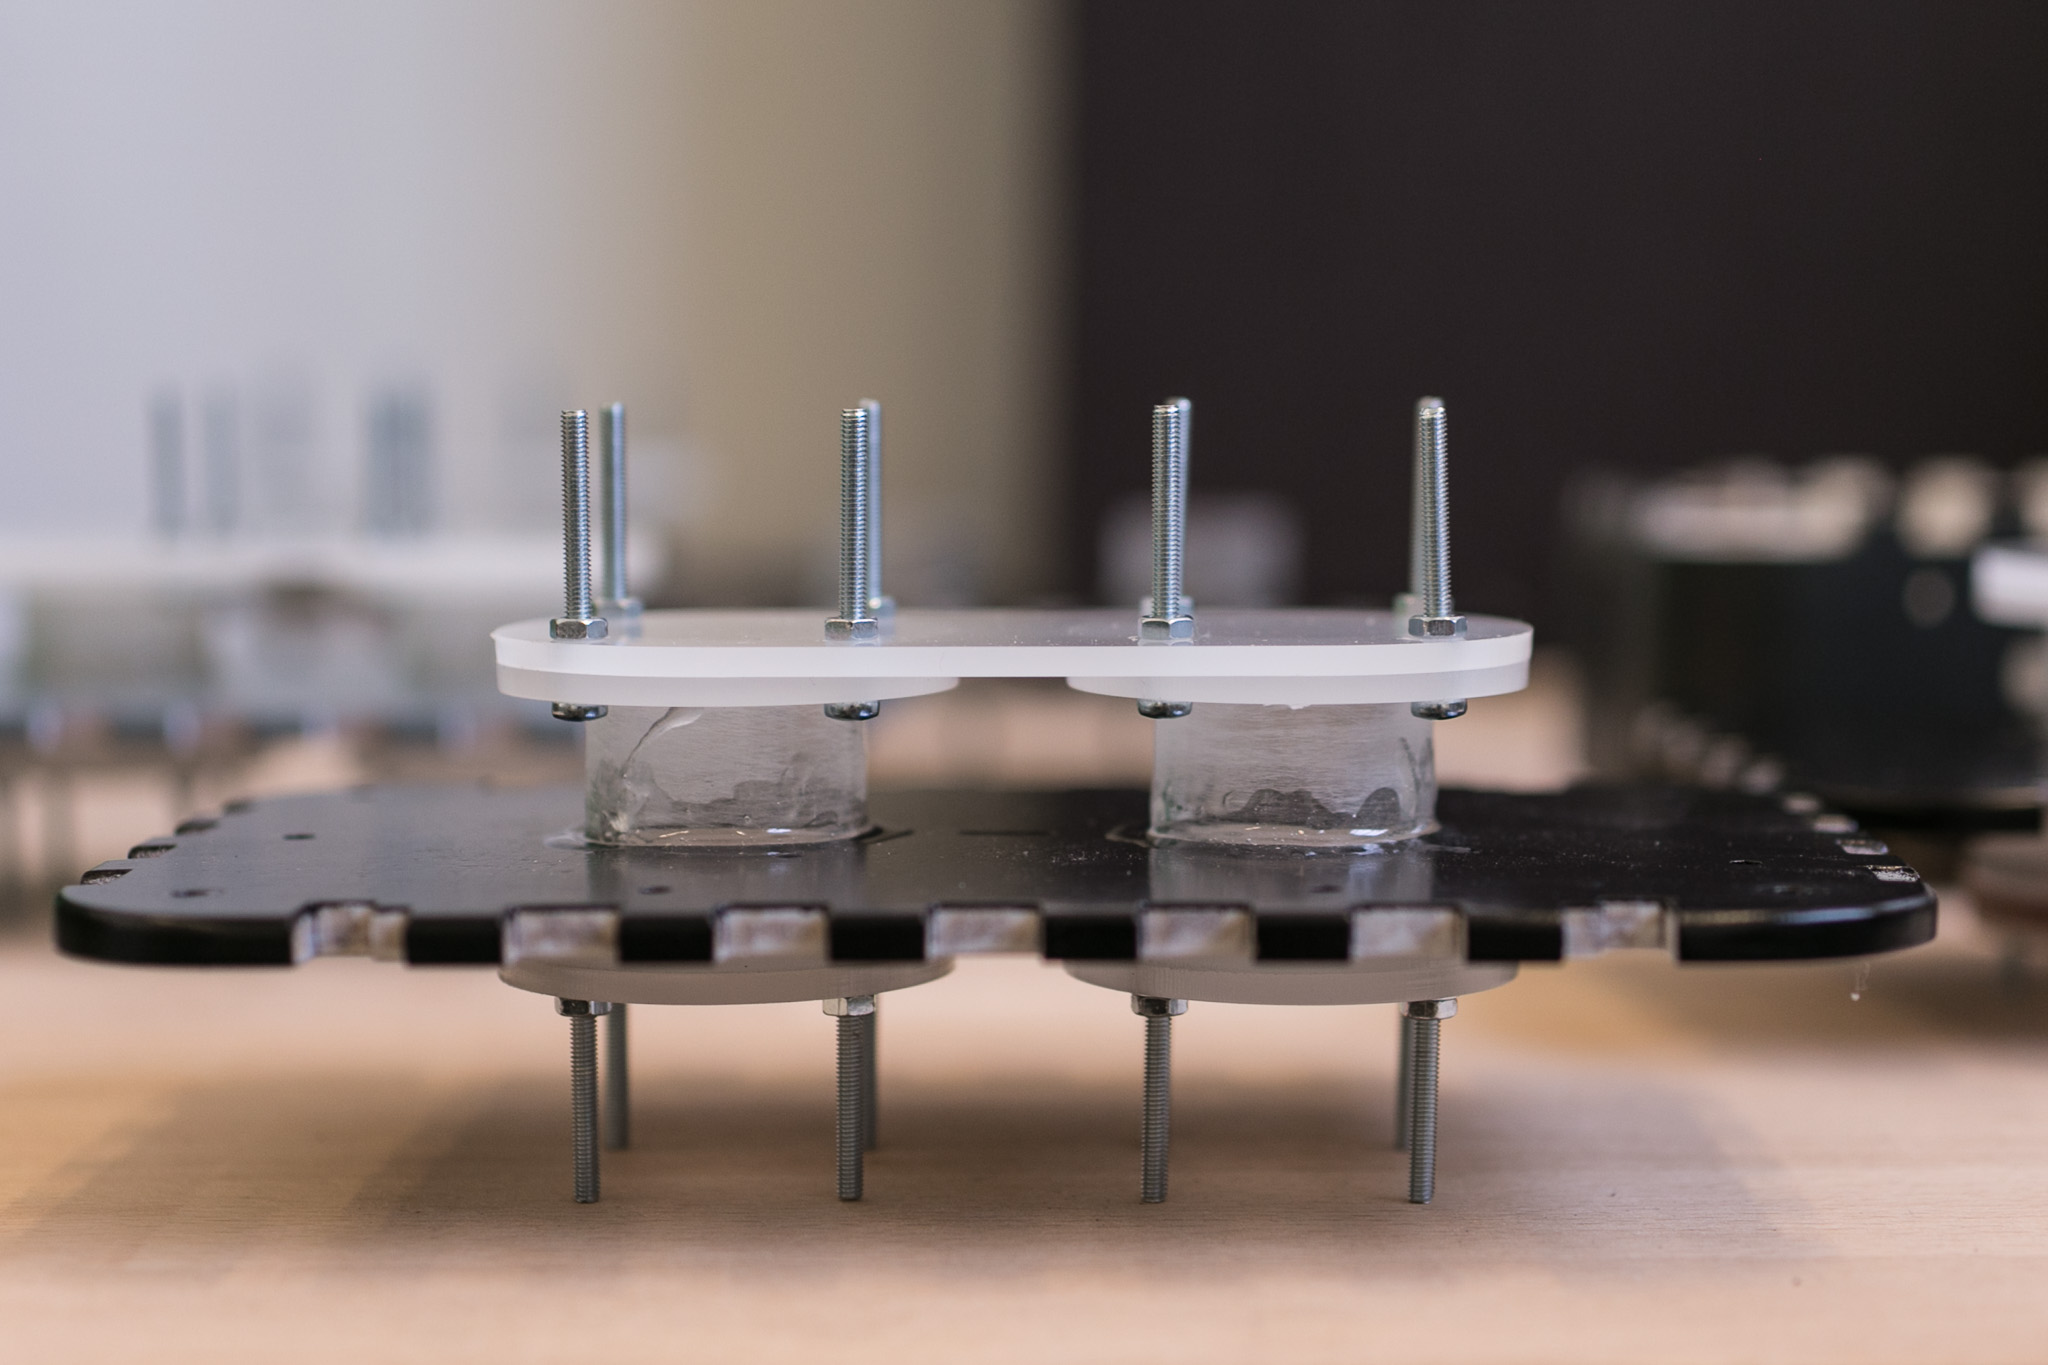
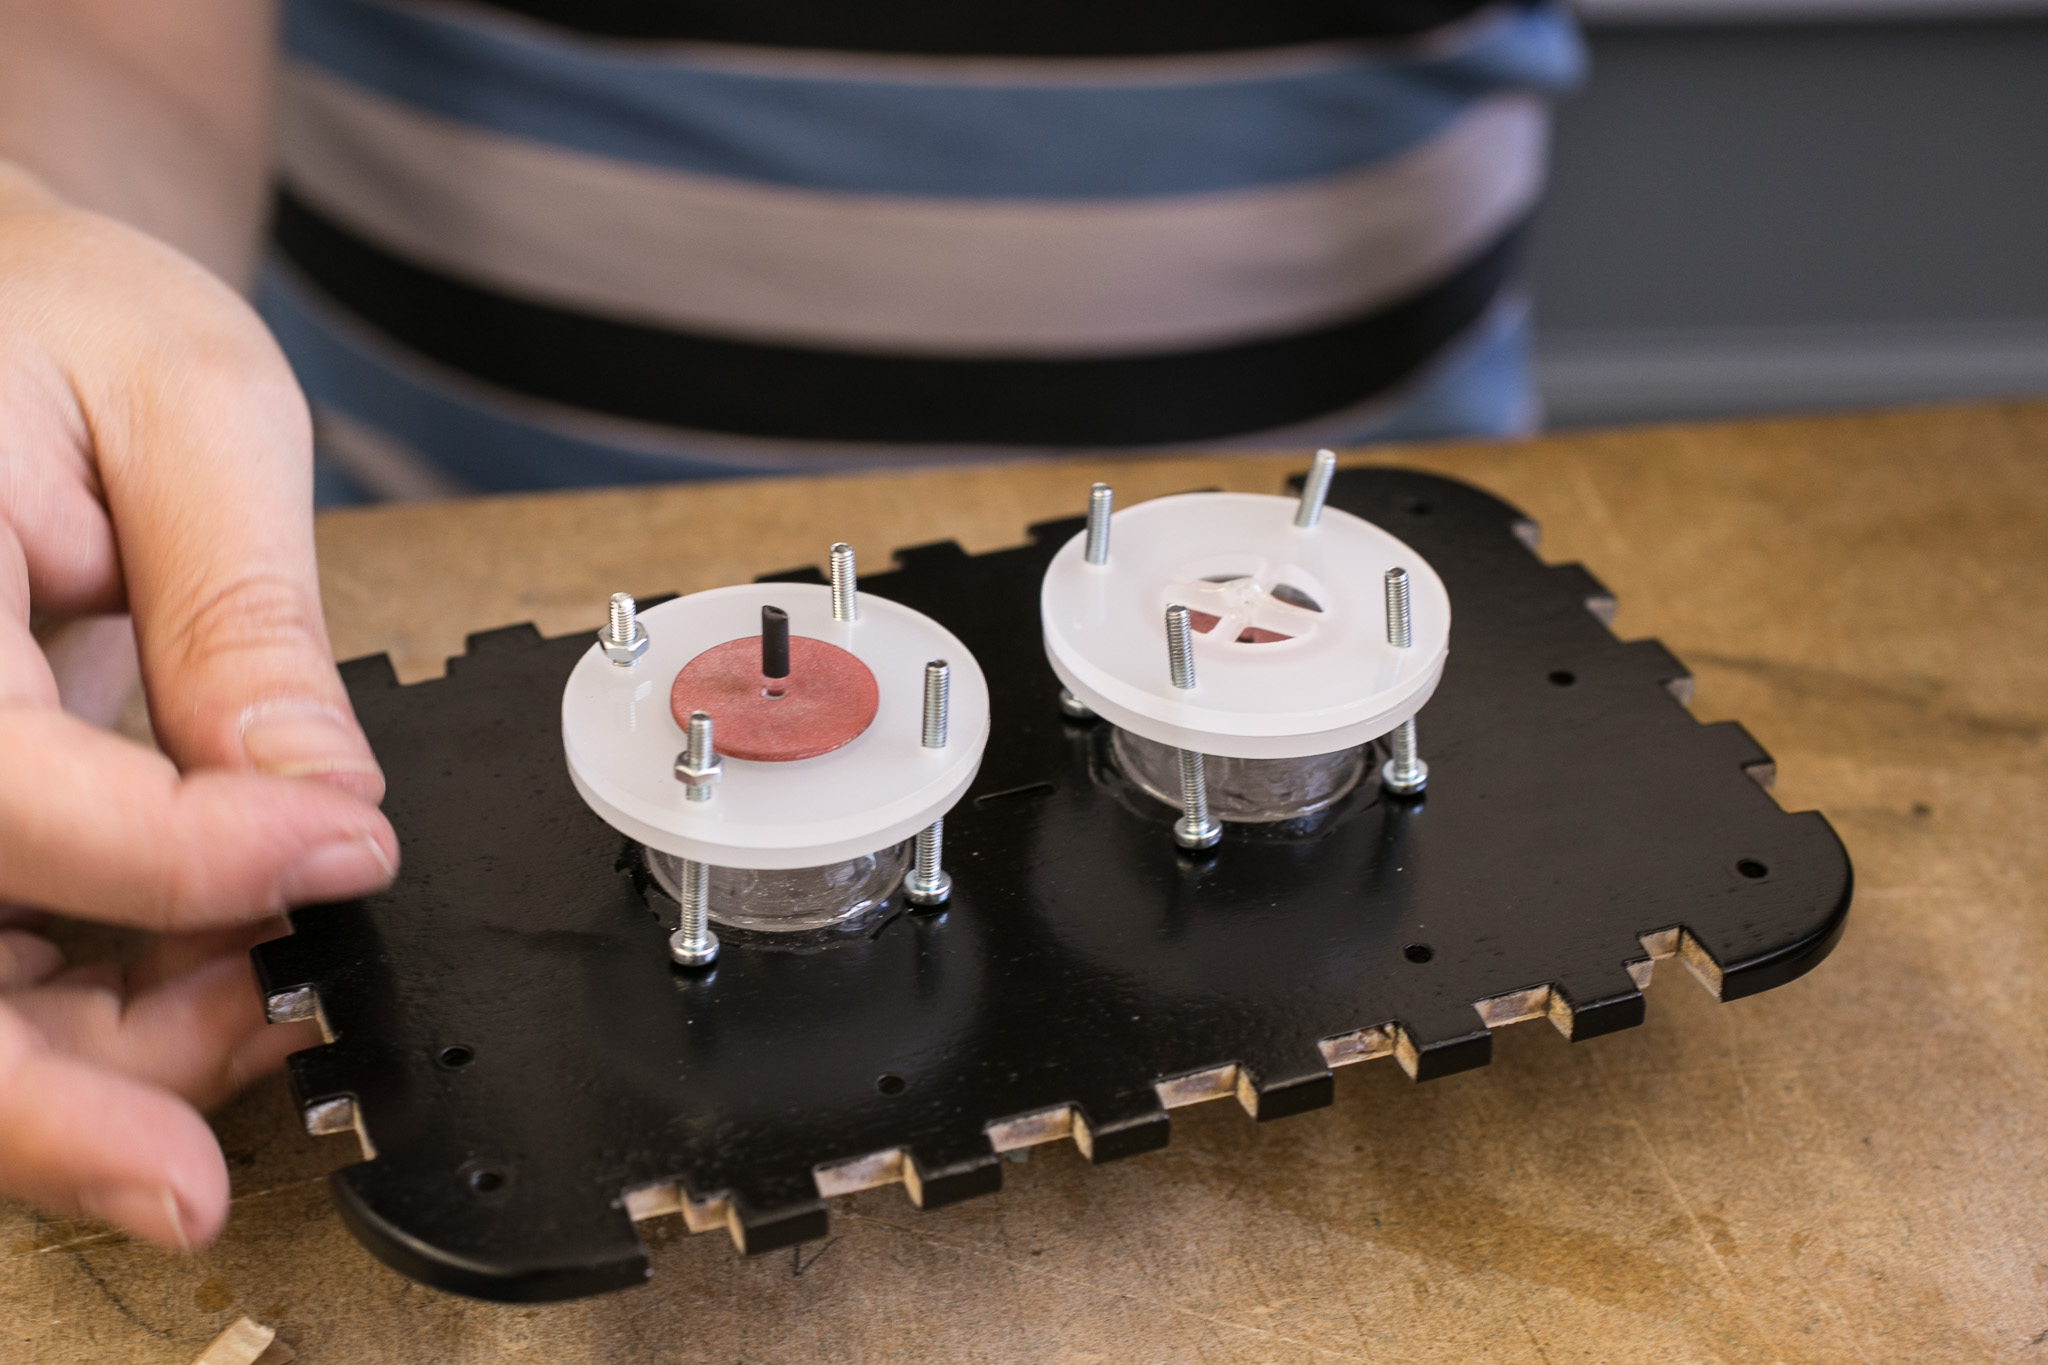
Take the helper plate (part E) and 8 screw nuts and mount the two tubes on it.
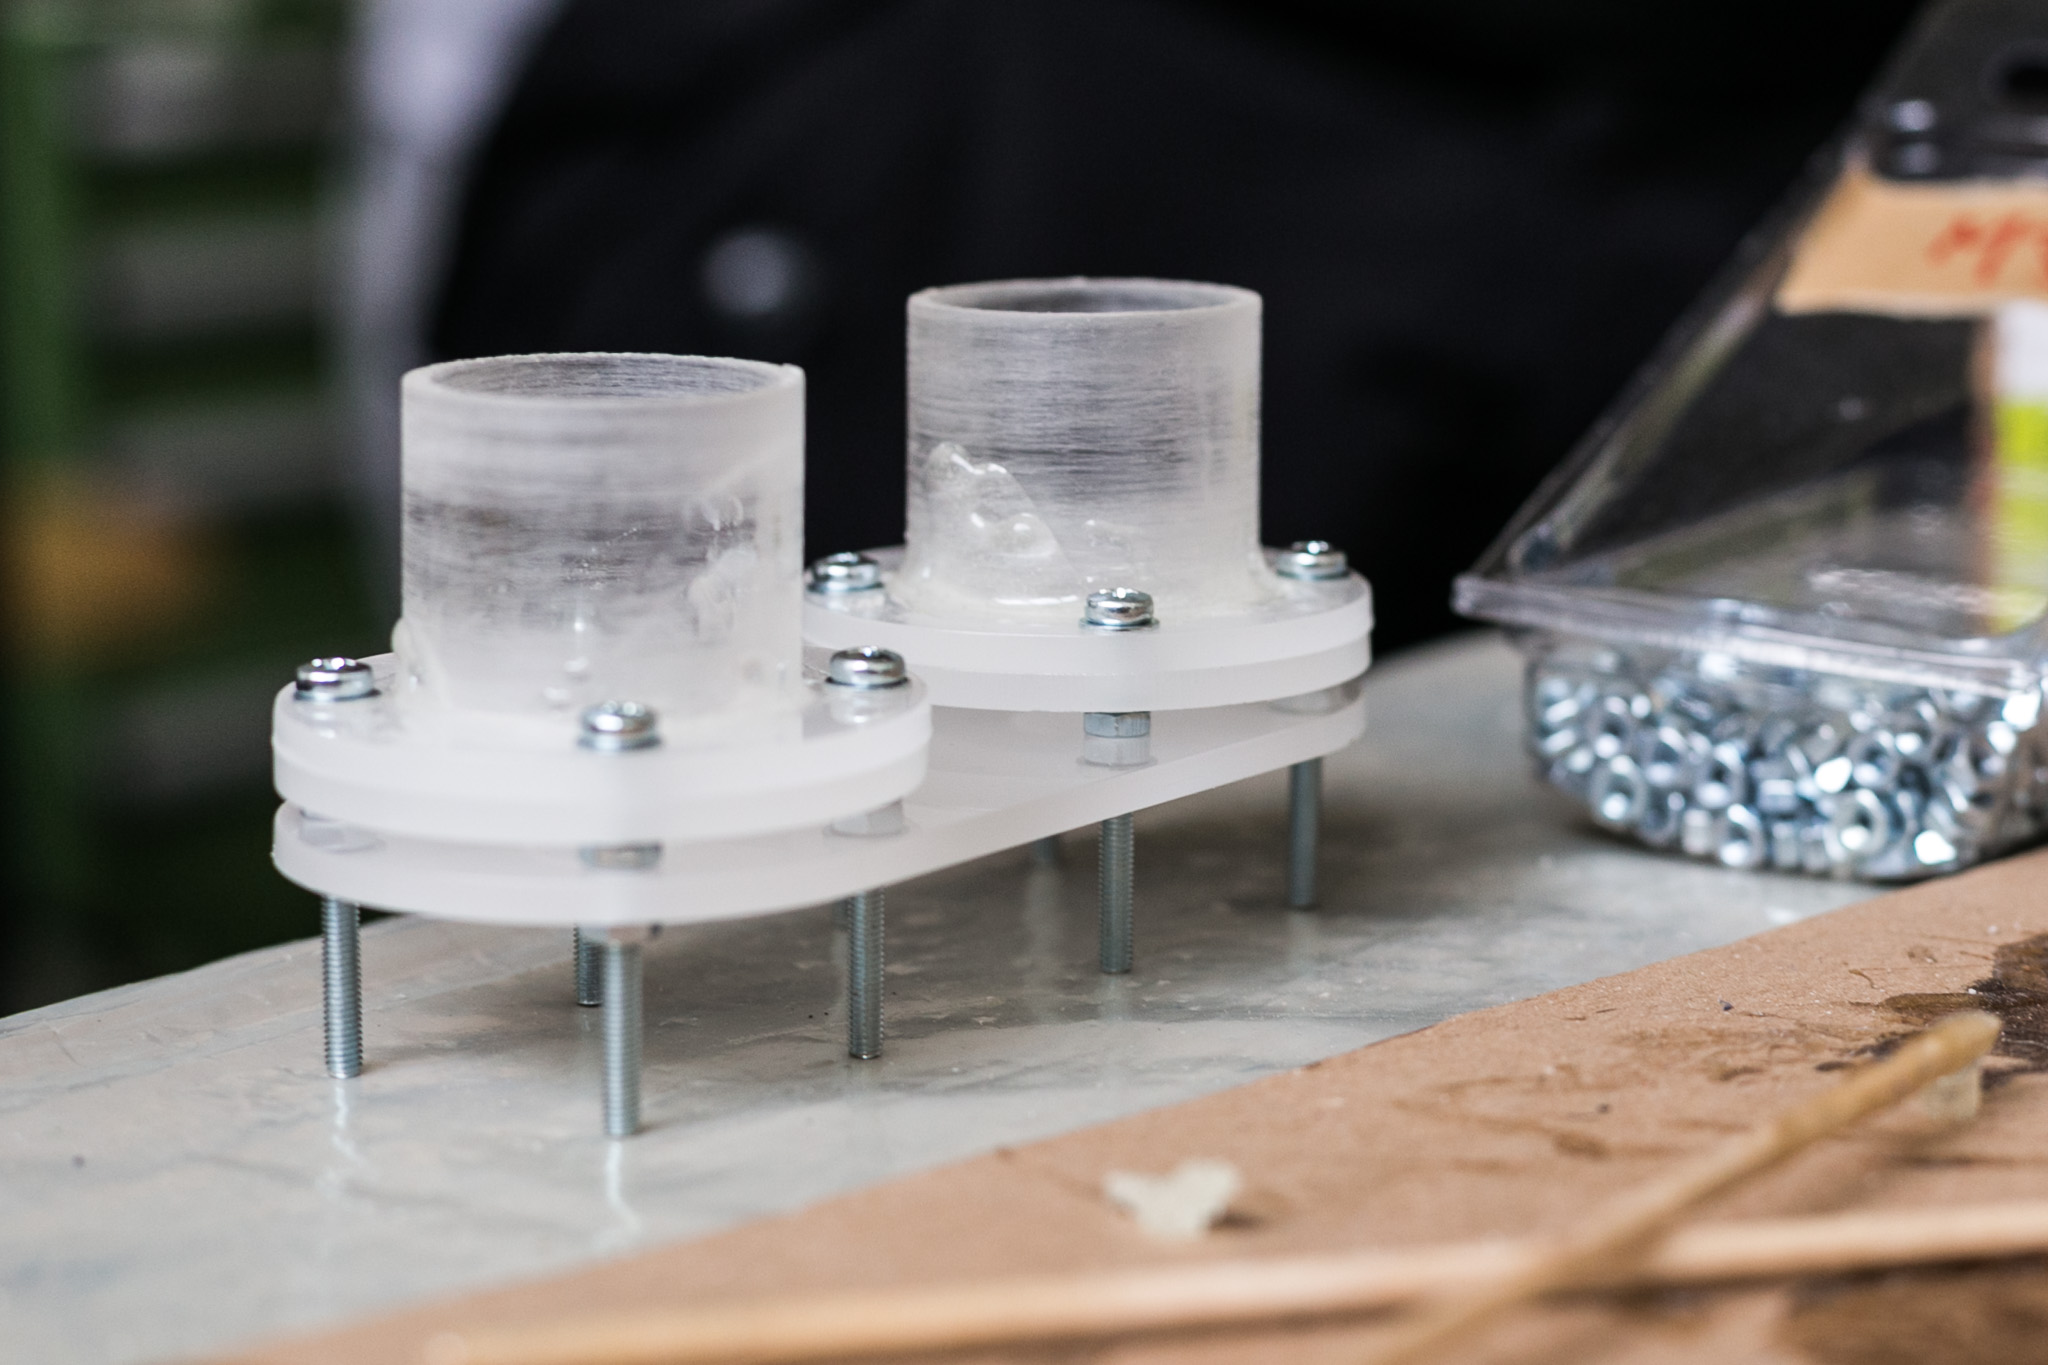 Helper plate and tubes (side view).
 Helper plate and tubes (top view).
Sand around the holes of the cover plate of the lower box to prepare for glueing.
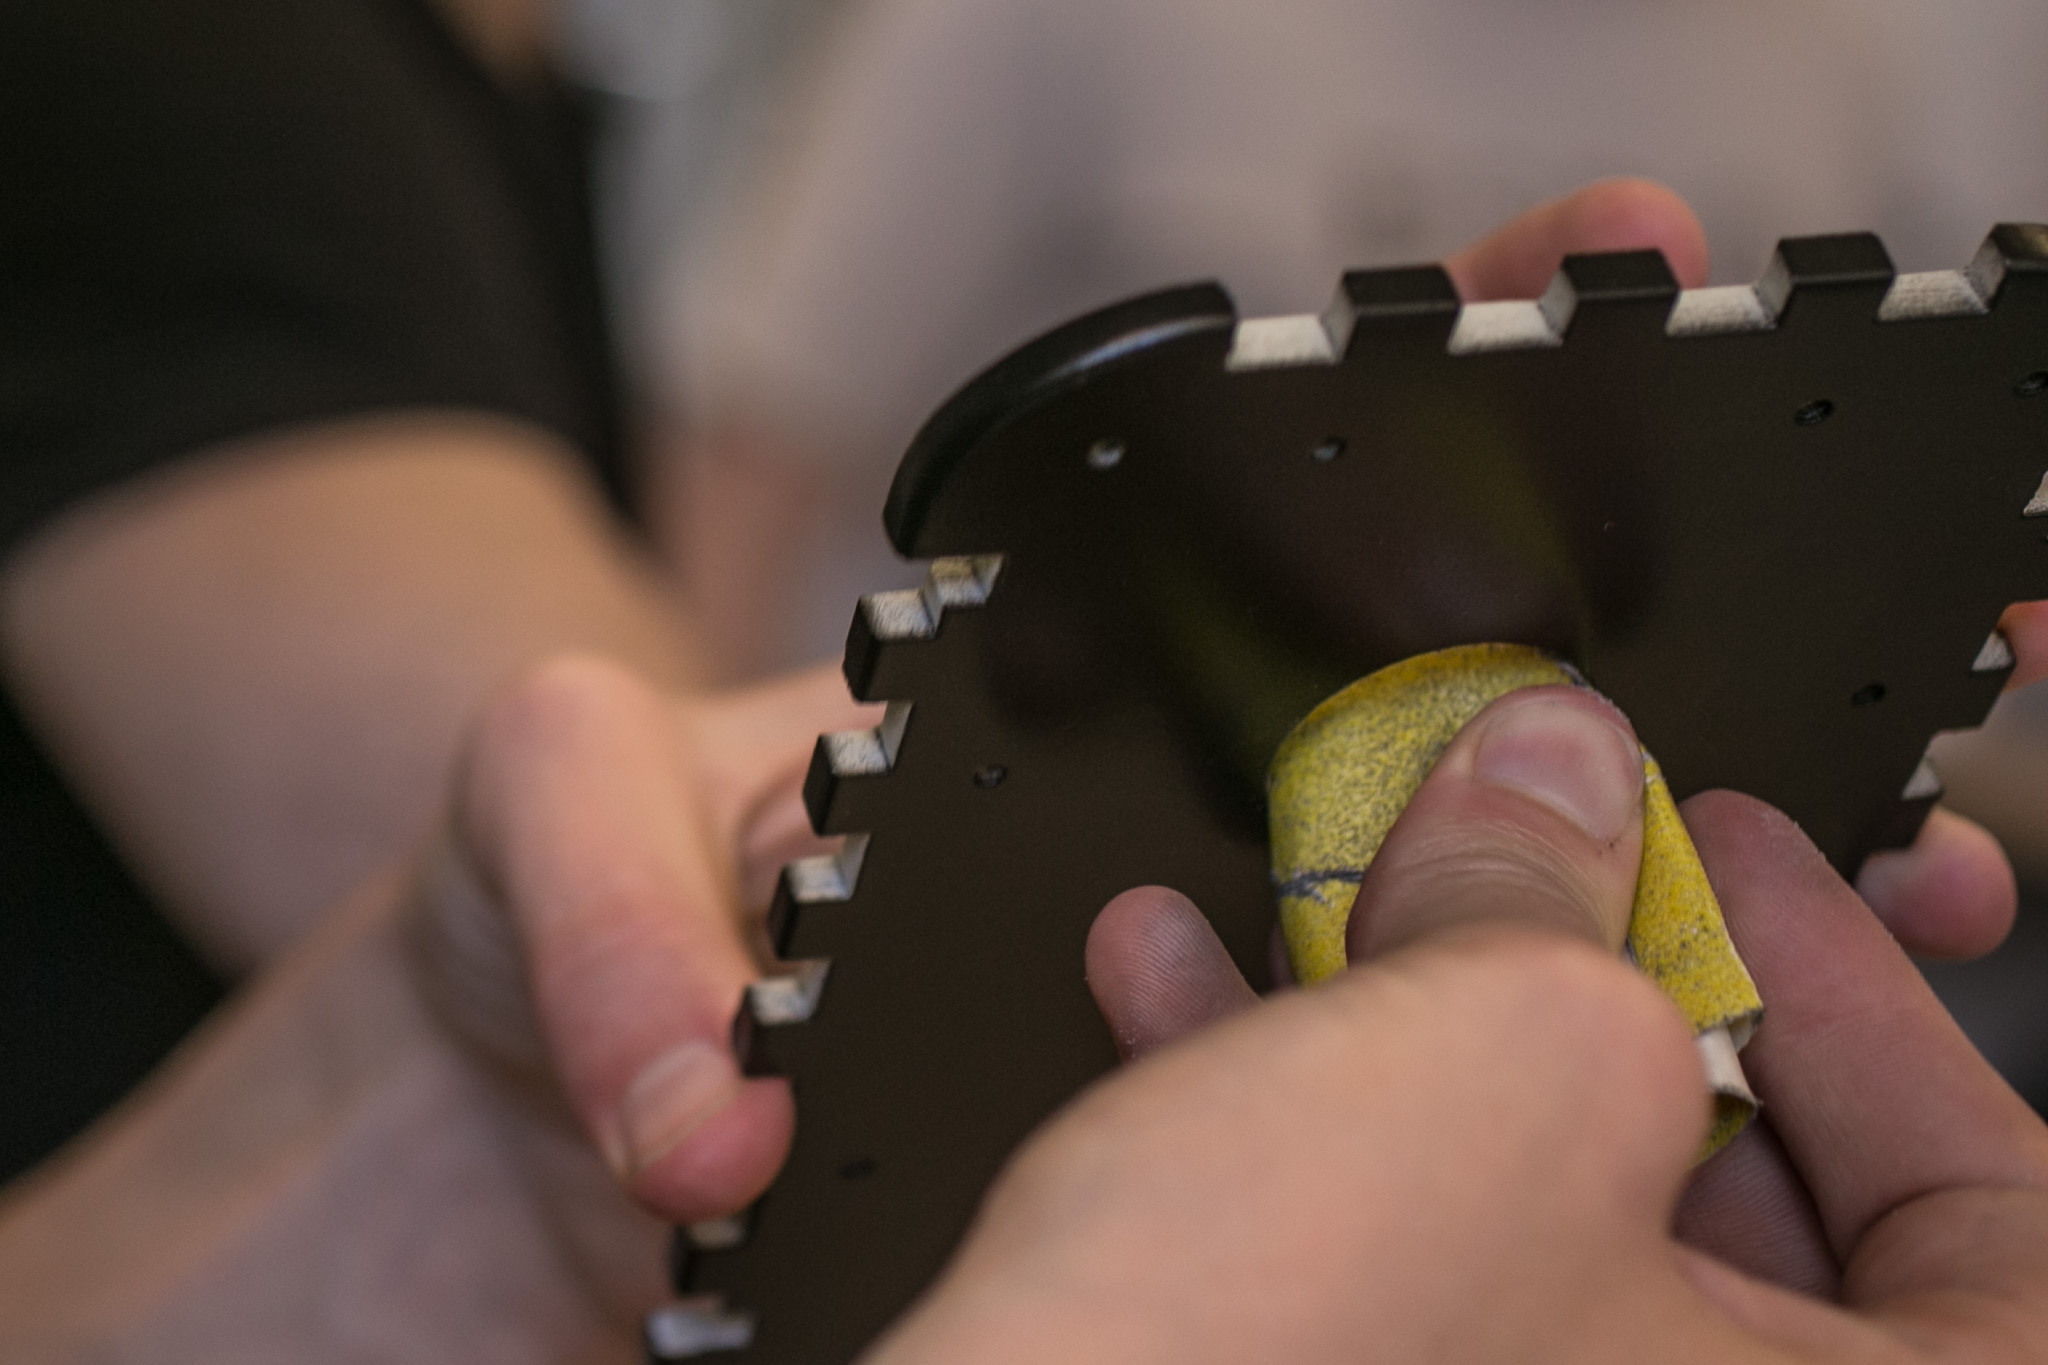 Sanding the cover plate.
Clean up the plate.
 Put the tubes through the holes of cover plate from below.
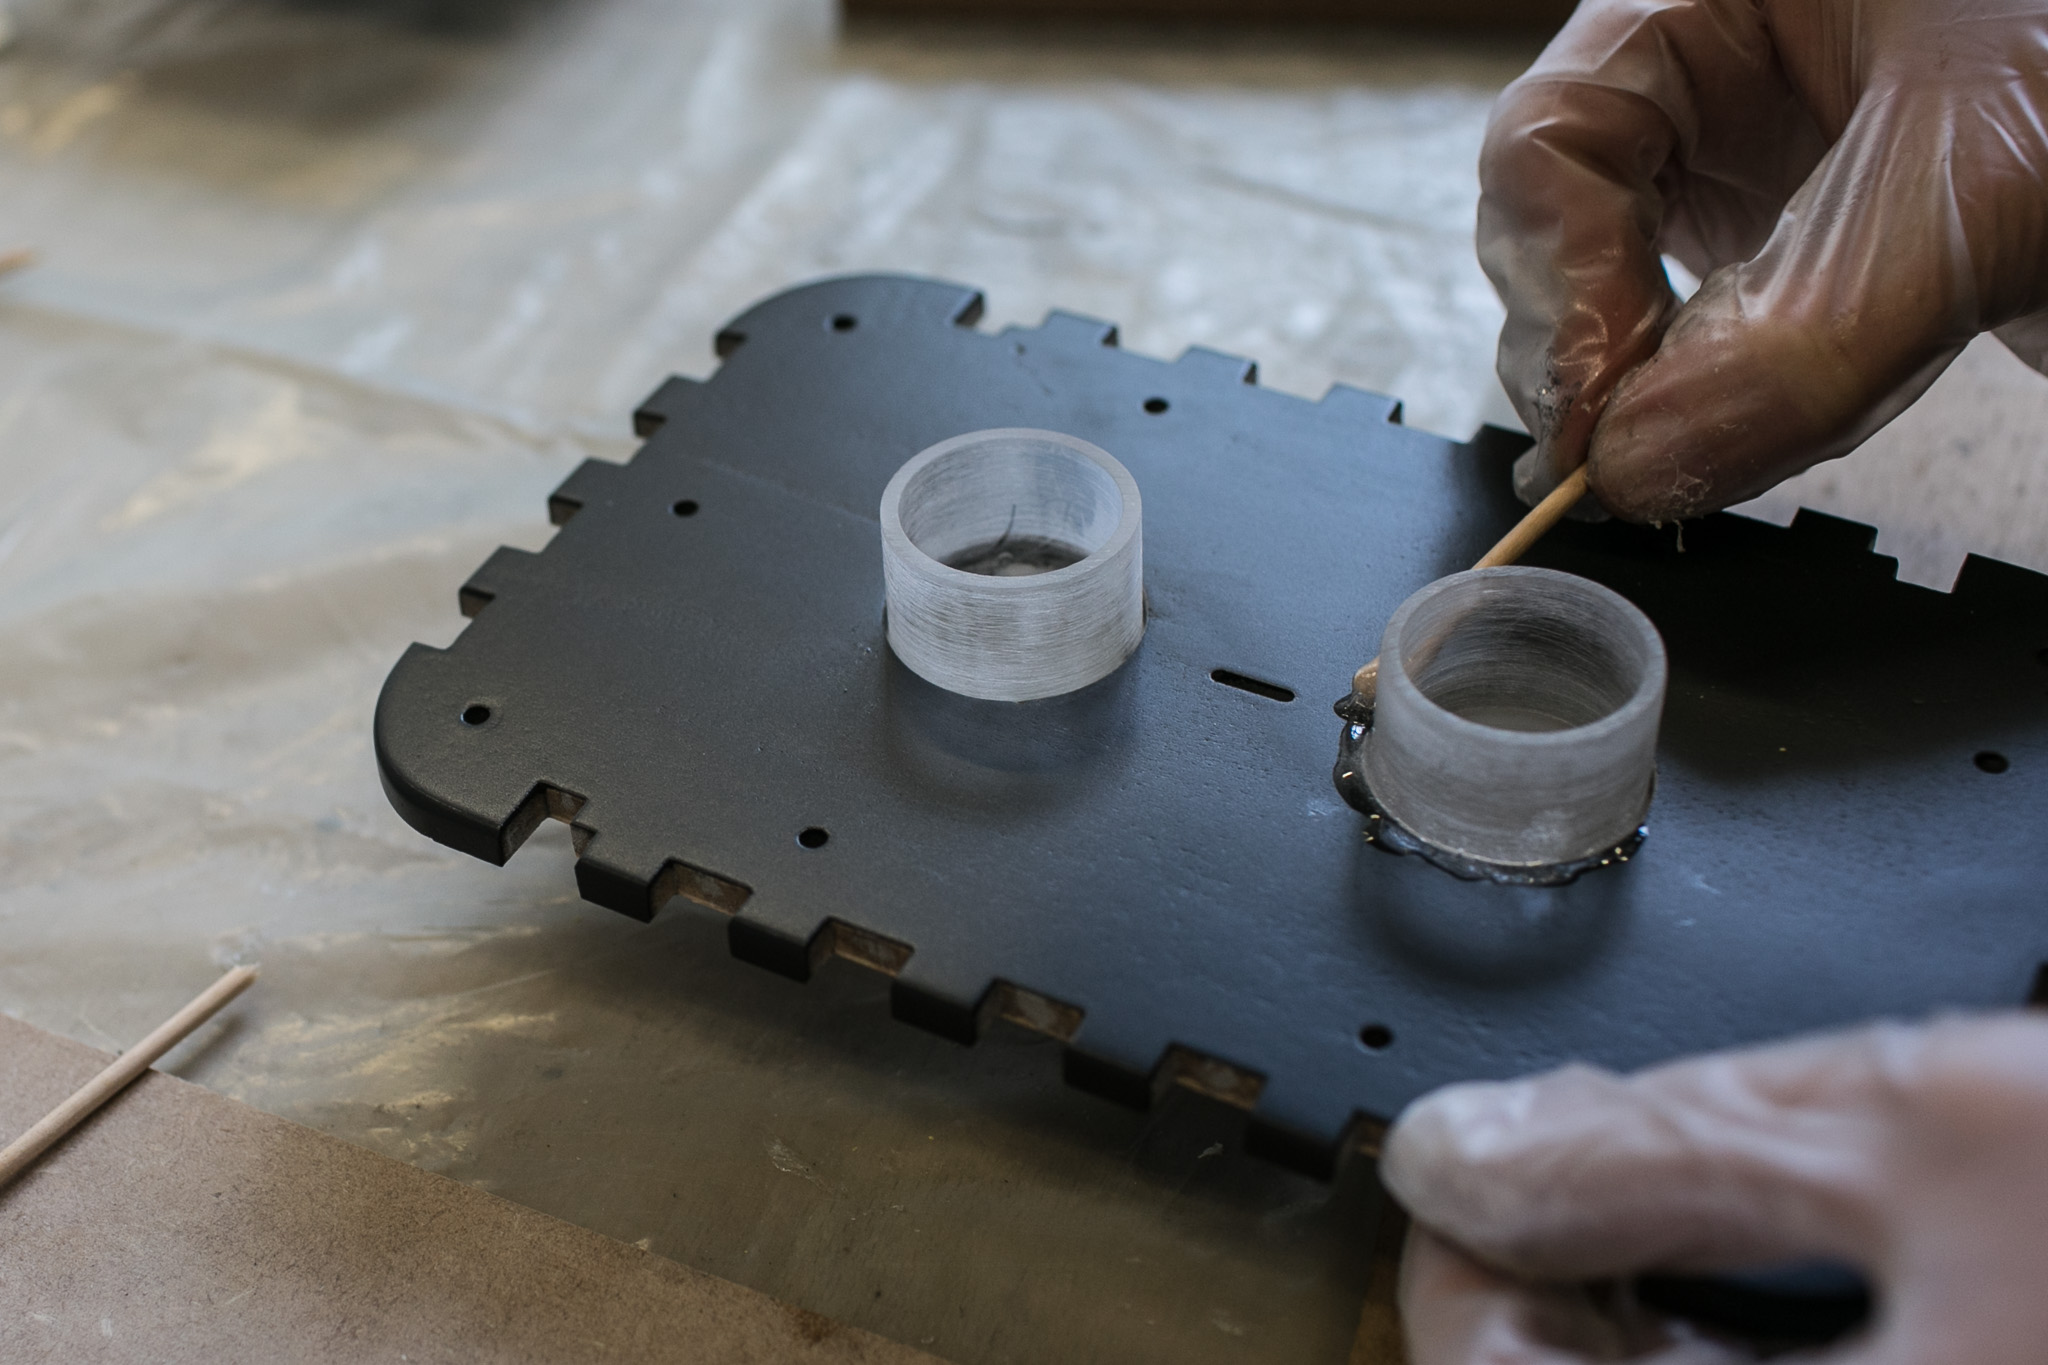 Use epoxy glue to fix the tubes and the cover plate.
Wait until the glue is solid before continuing with the next steps.
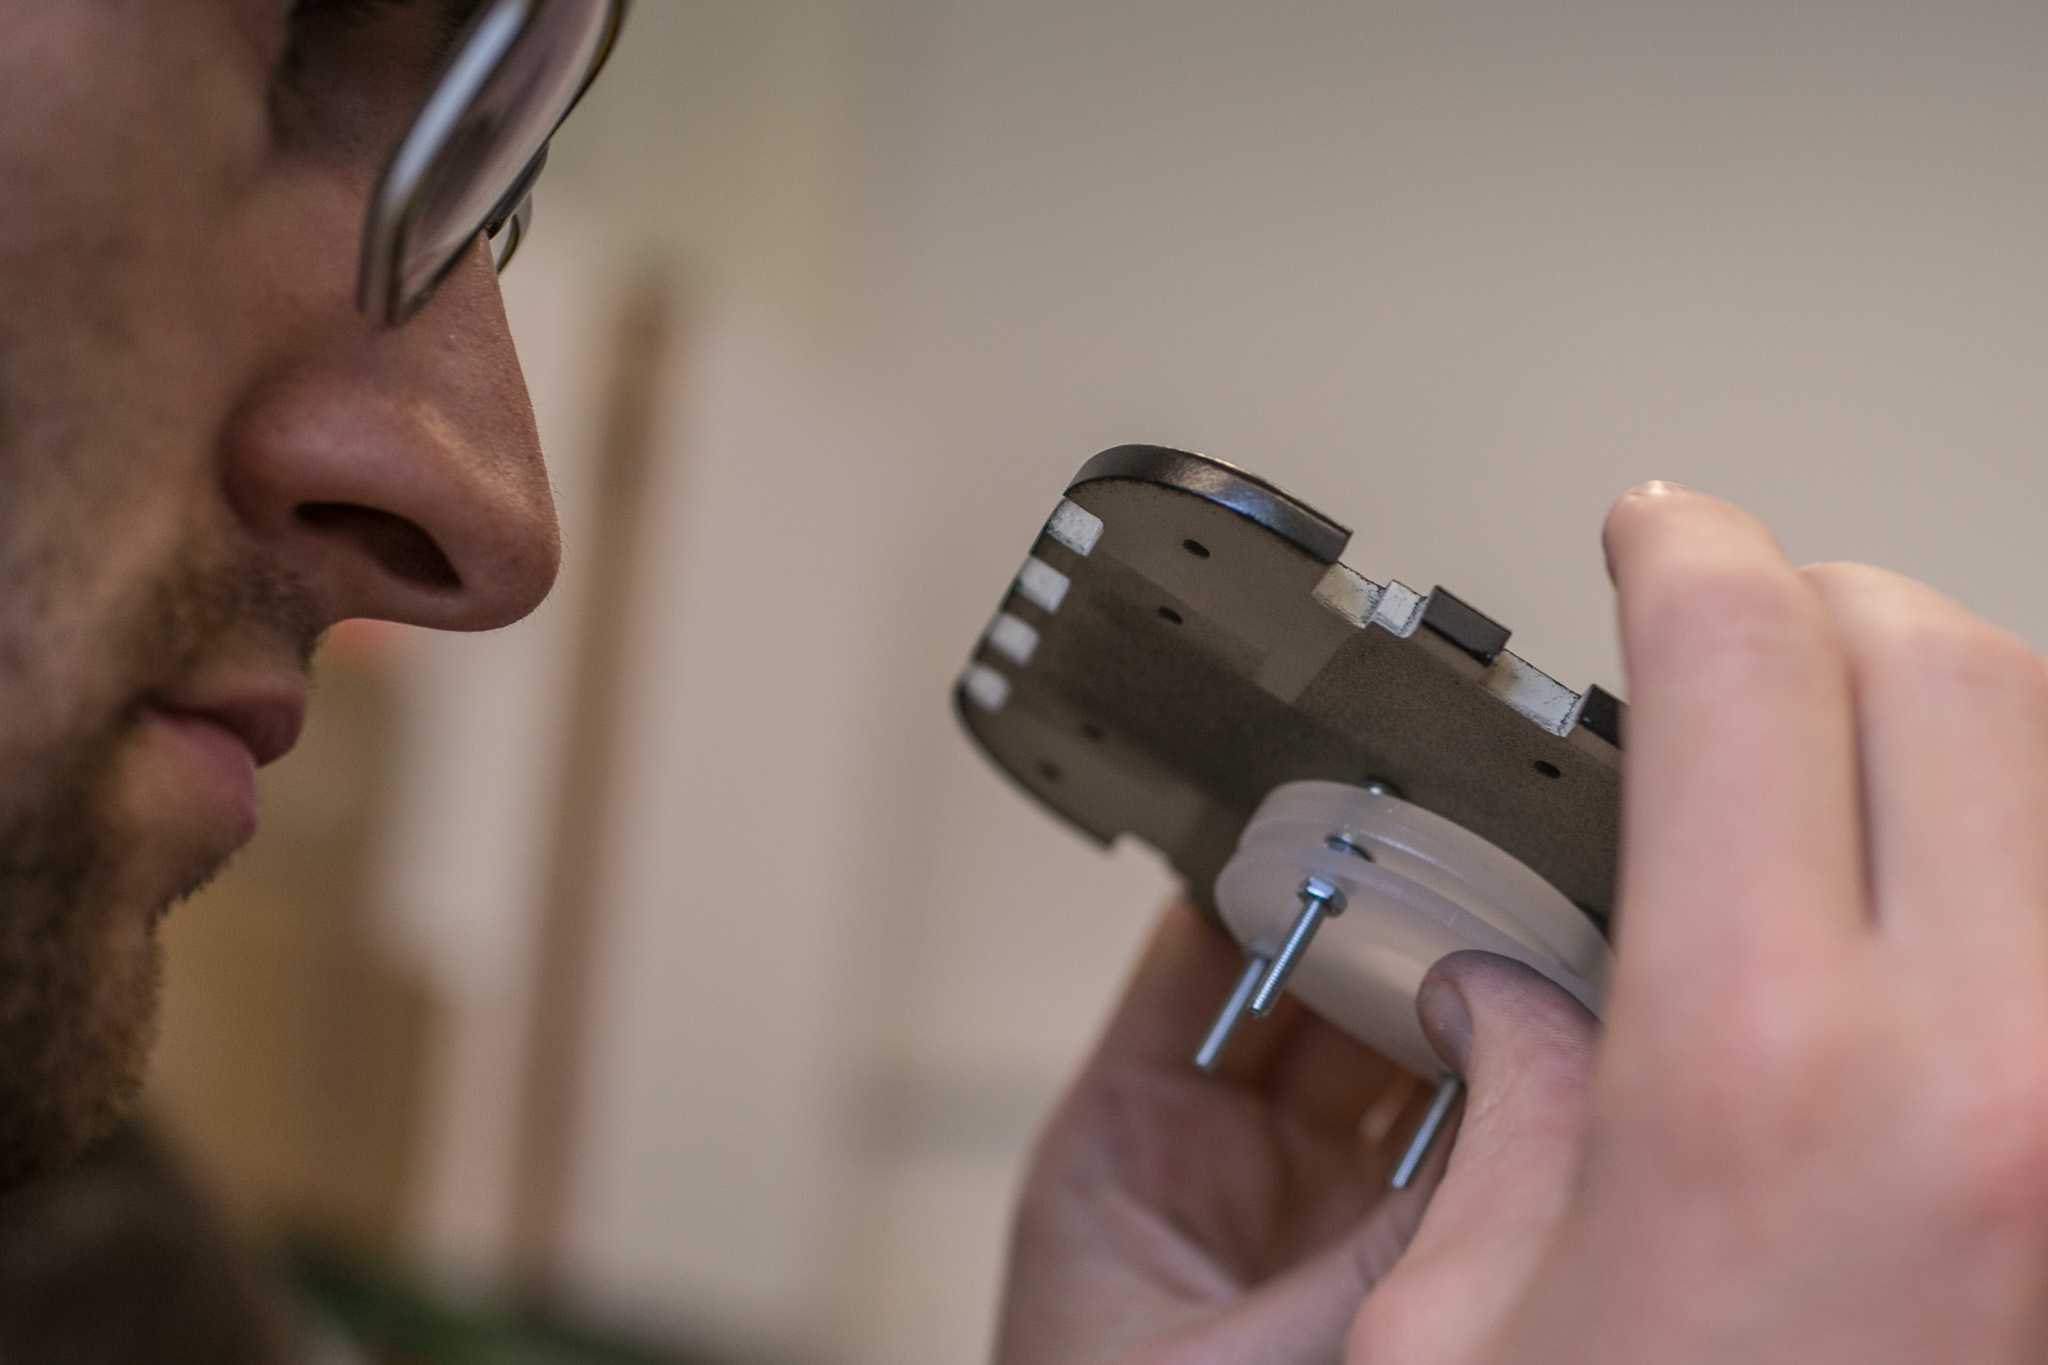
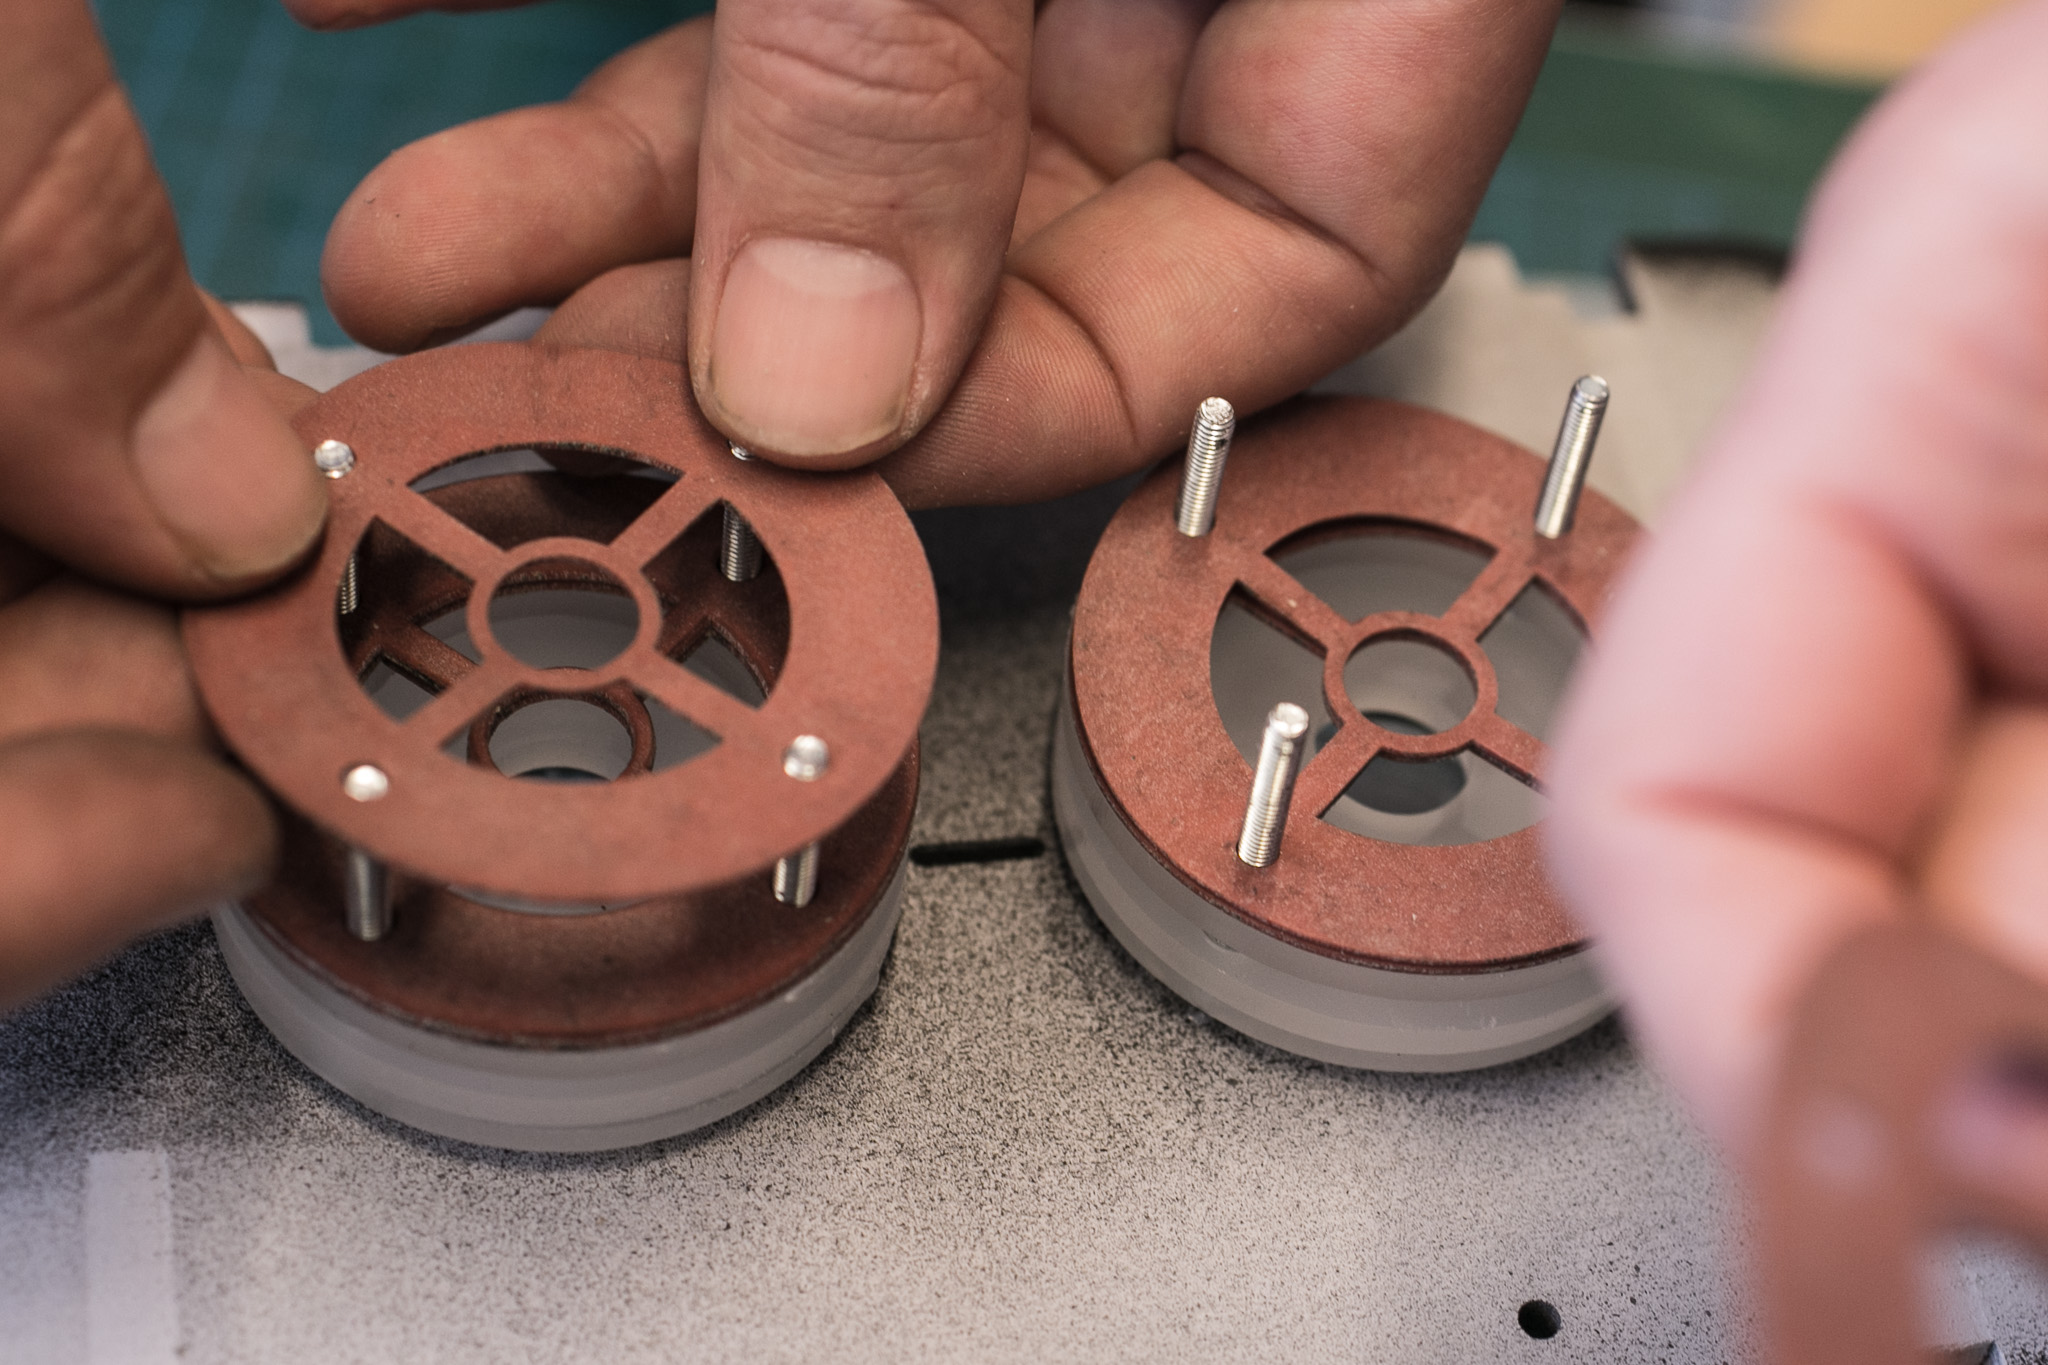
Remove the helper plate, take 8 screws and screw nuts and mount the two spare flanges (part A) on it.
The gaps of the flanges have to point away from the helper plate.
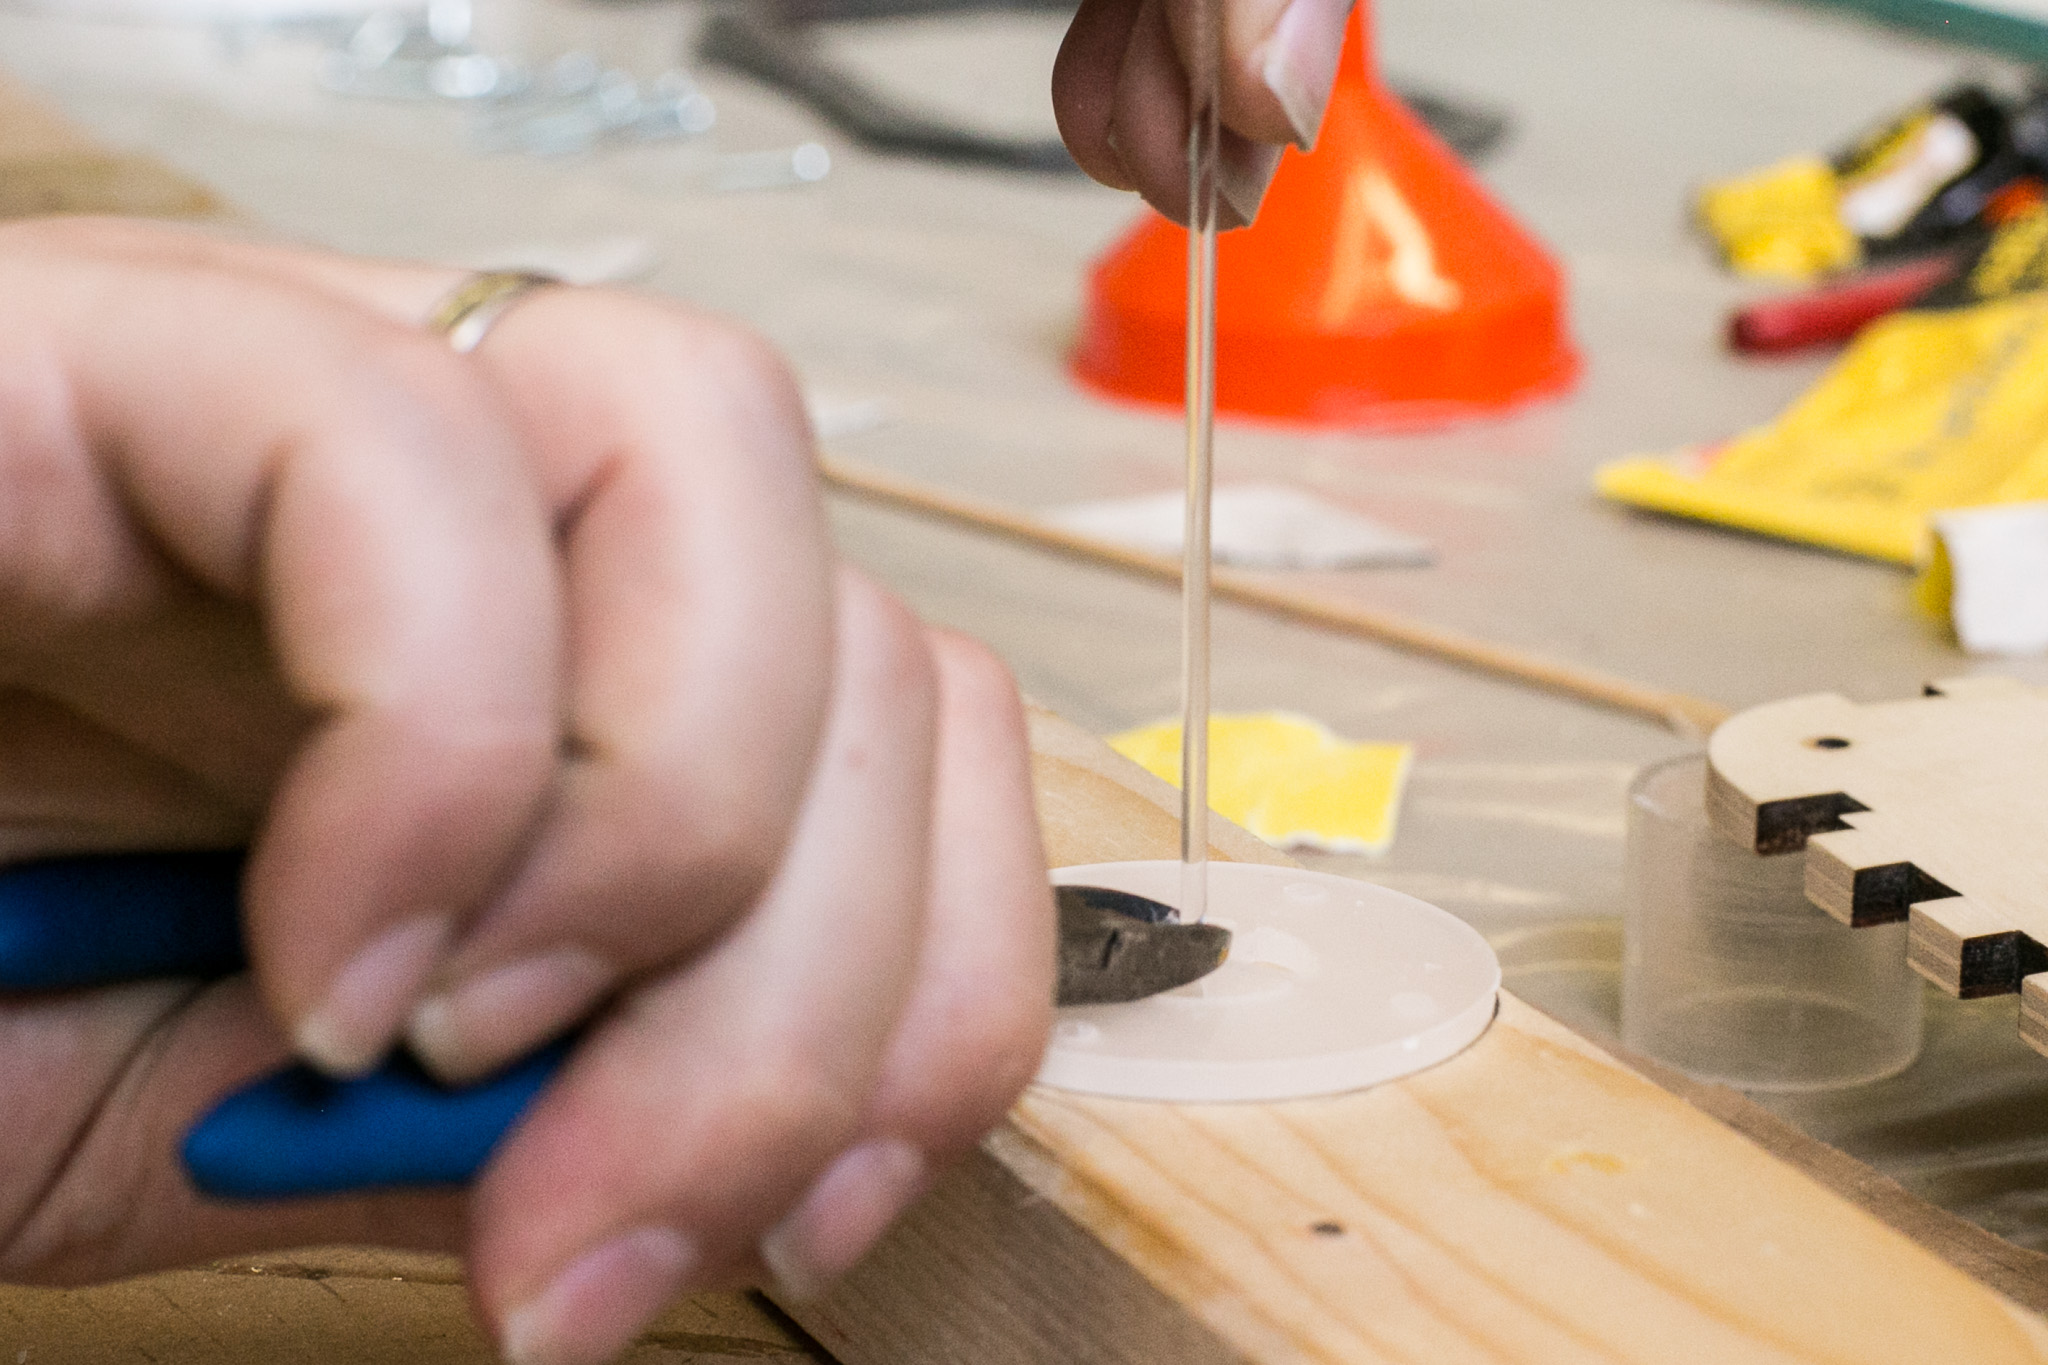
 Apply epoxy to the gaps of the flanges.
 Attach upper flanges to the tubes.
When the glue solidified, you can remove the helper plate.
Assembling inlet and outlet
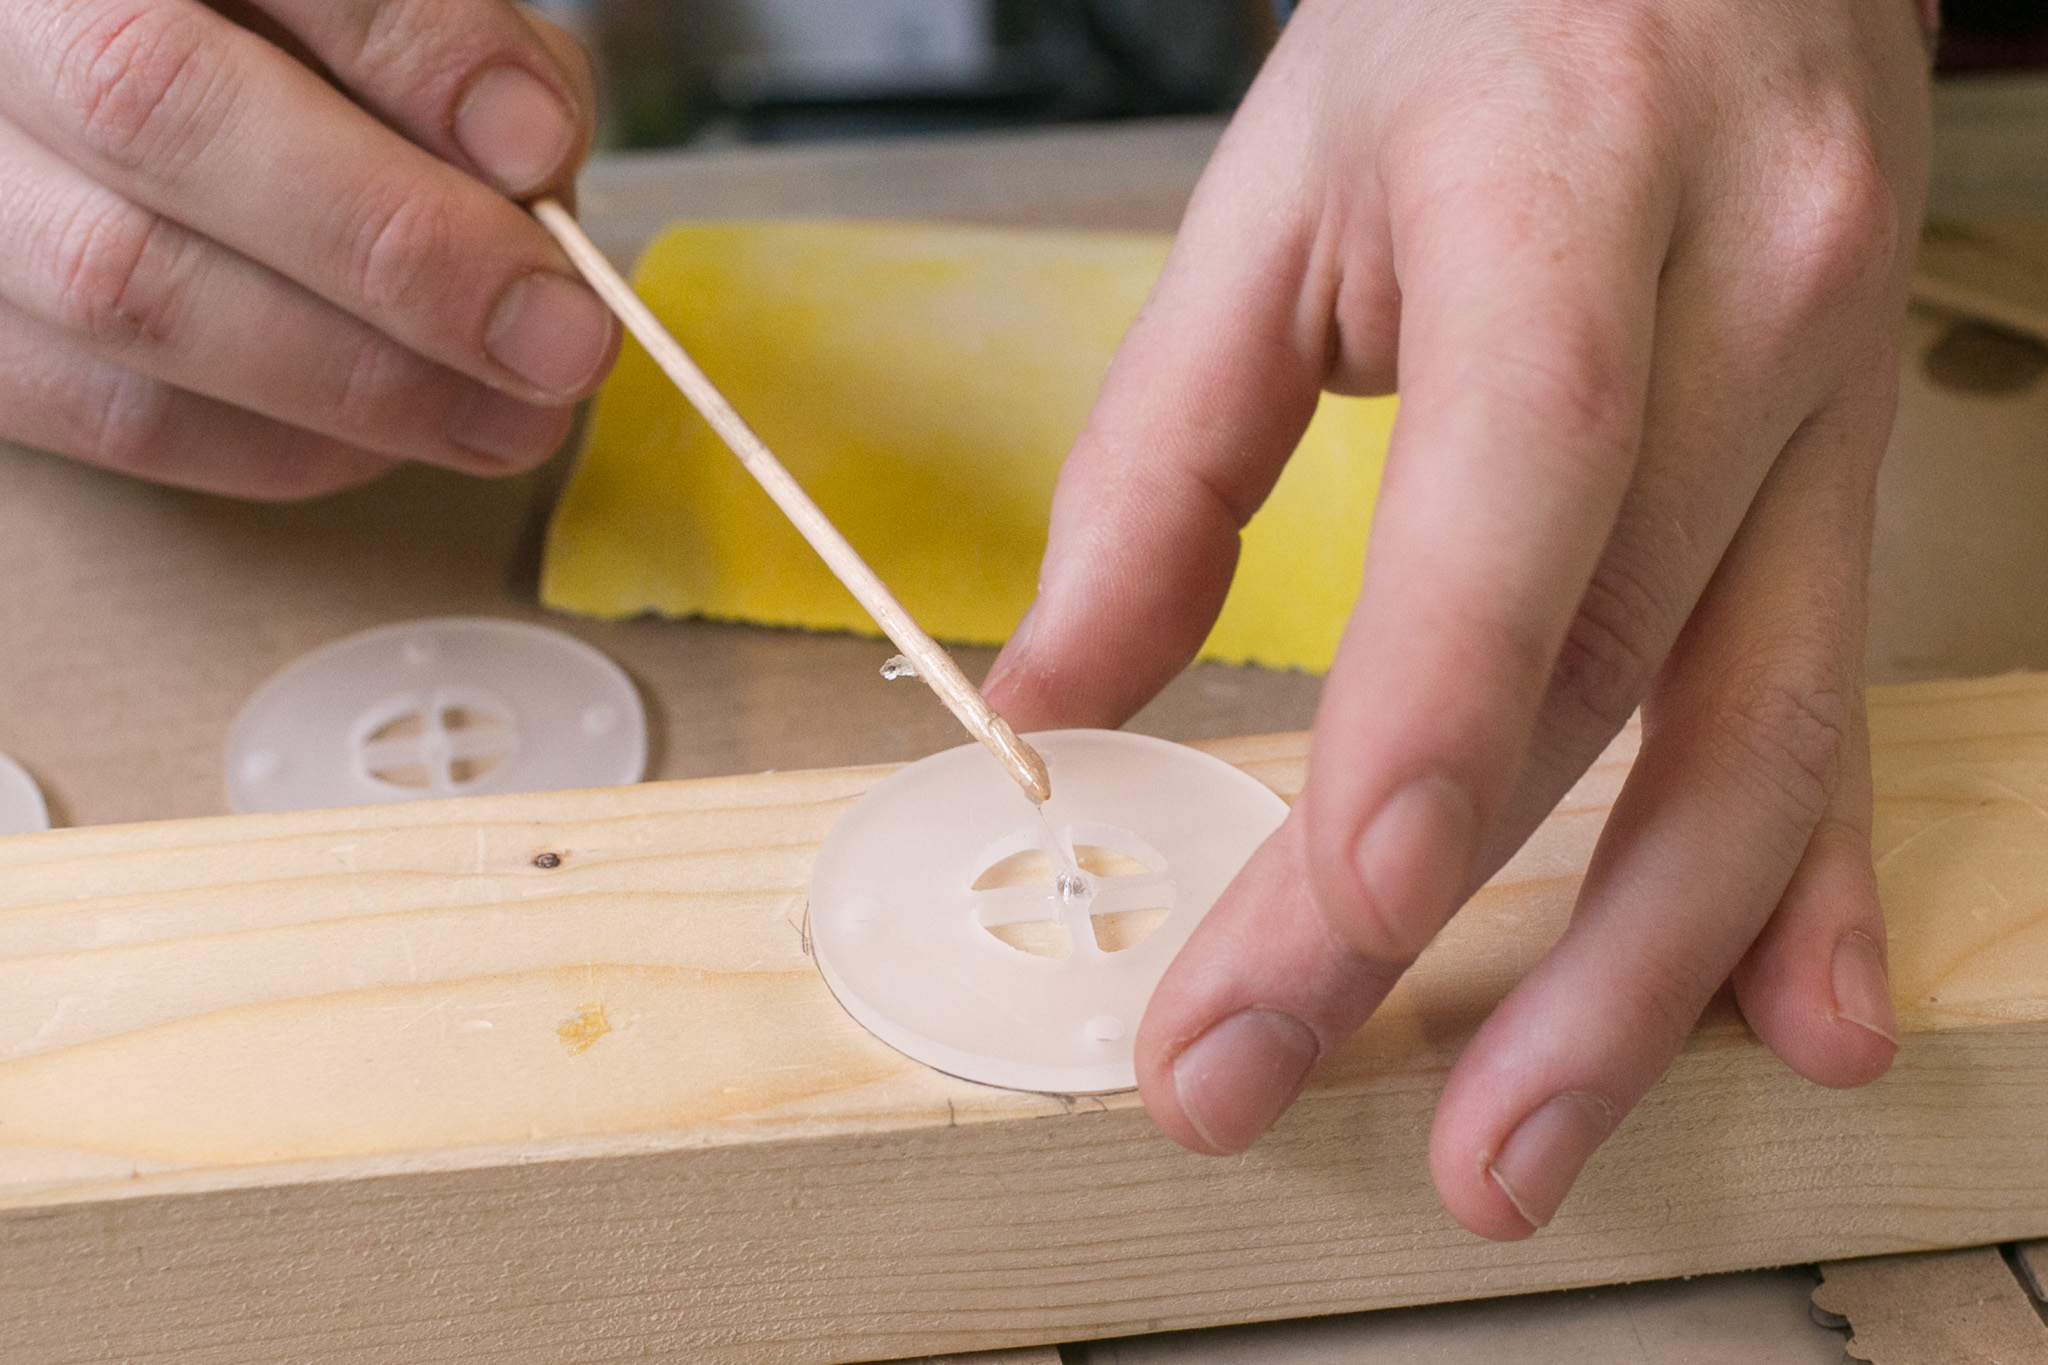
Take the wooden scrap-block an drill a hole with a depth of around 10mm (using a 1mm drill).
Put one of the inlet/outlet disks (part C) above the hole and stick in the acrylic rod.
 Cut the rod 1mm above the inlet/outlet disks.
 Use the rods overlap to glue the rod to the disk.
Make sure there is no glue on the other side of the disk.
Make a second disk/rod combination.
Put a rubber disk (part F) over each of the rods.
Use several layers of heat shrinking tubes over the rod.
The rubber disks should be able to move up and down freely along the rod for around 2mm.
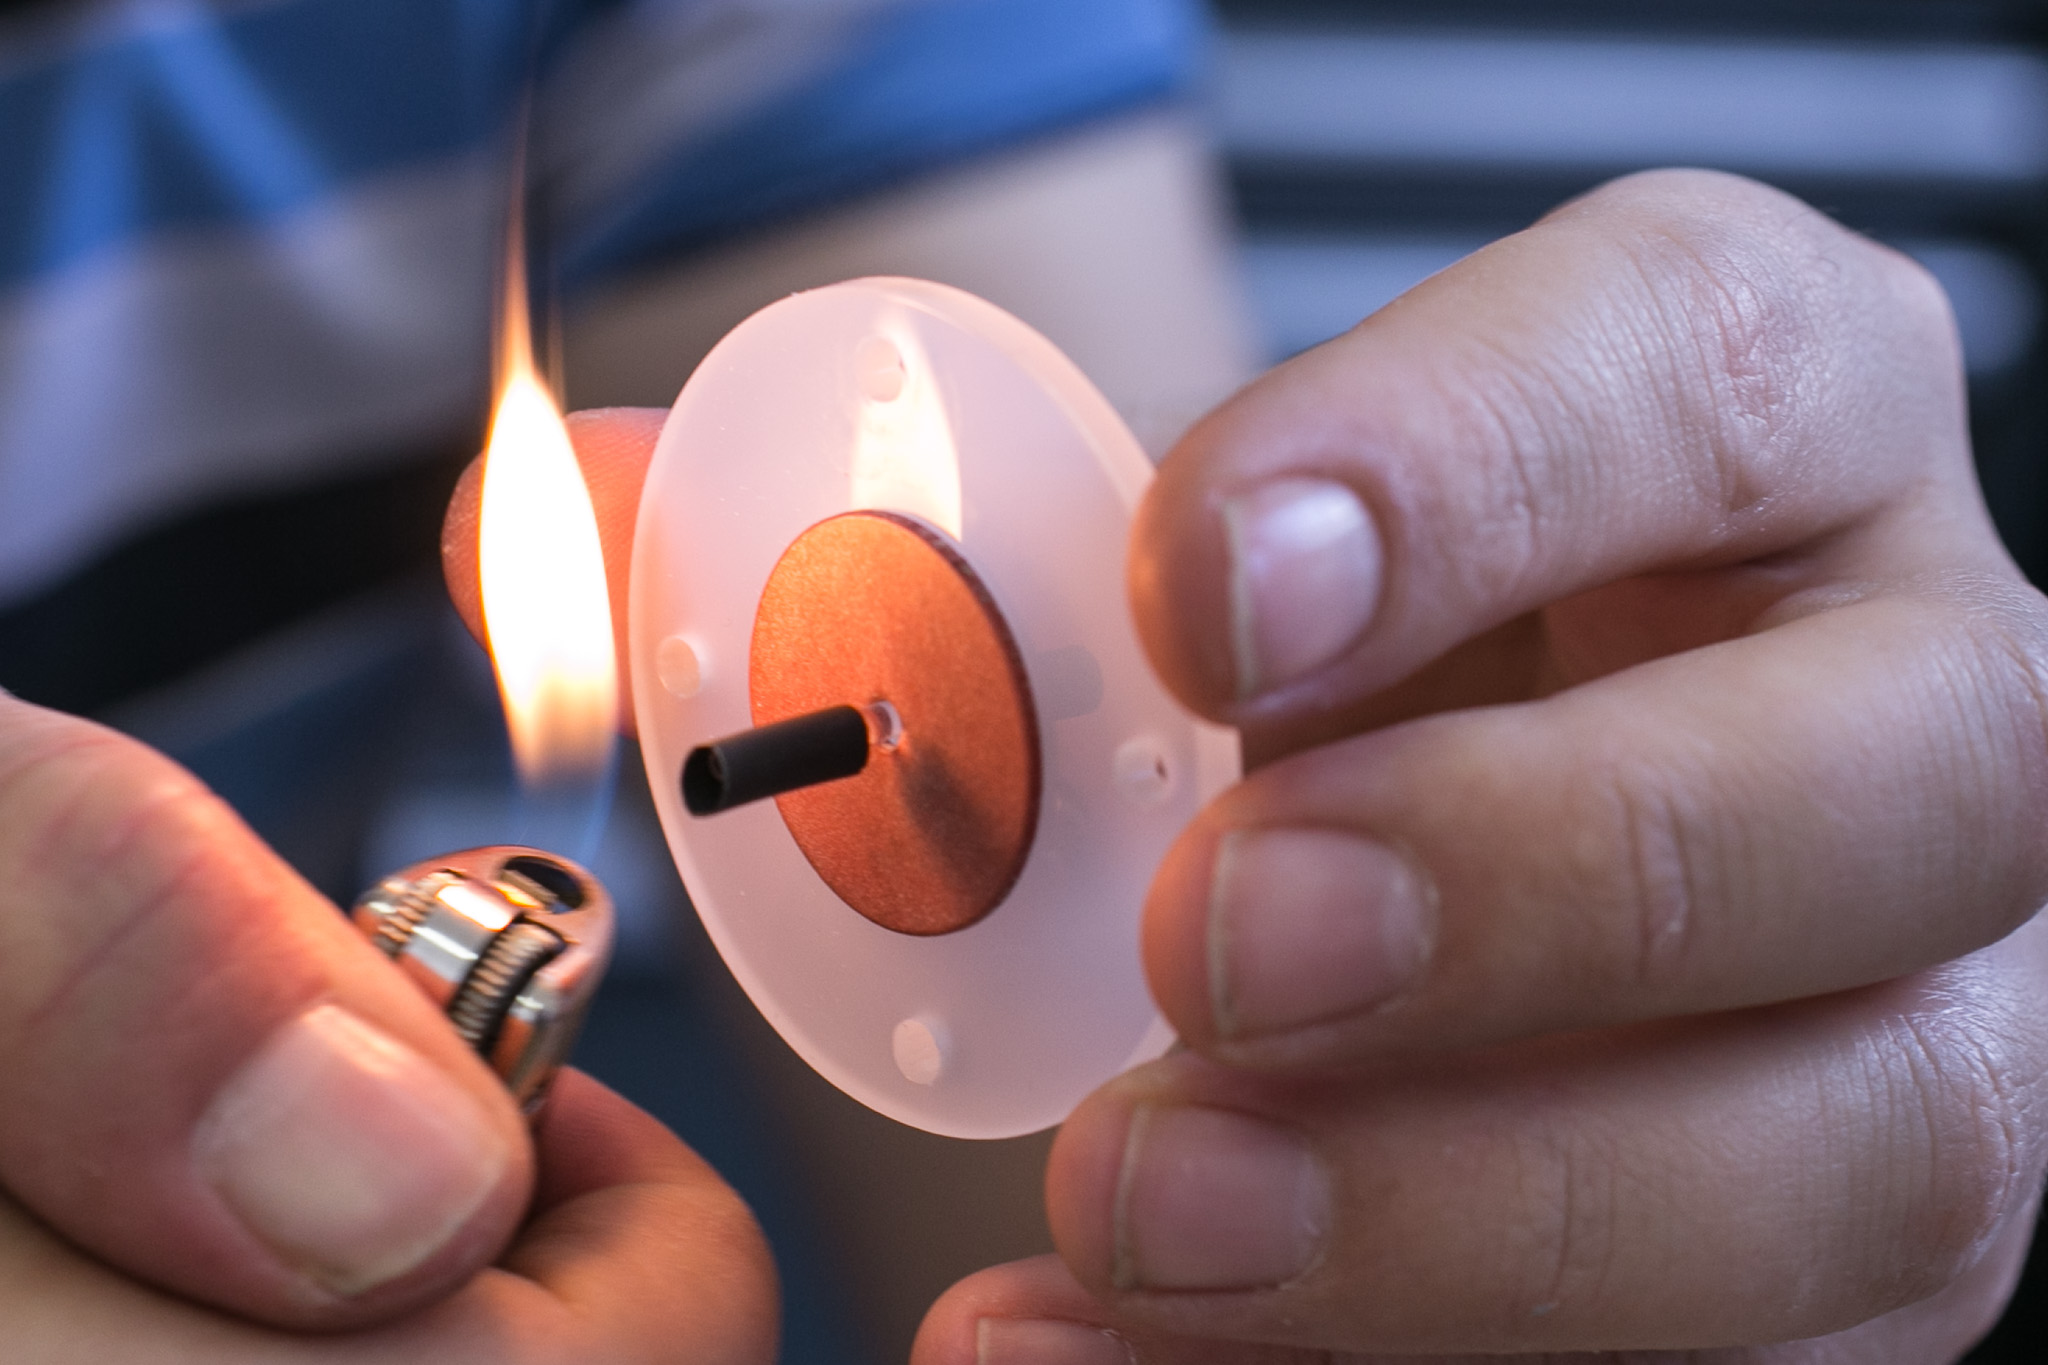 Use a lighter to shrink the tube.
 Place the inlets/outlets on top of the tubes, one pointing inwards, one pointing outwards.
Building microphone mounts
 Put one acrylic ring (part D) below each of the tubes.
 Put three rubber disks (part G) below each of the tubes.
Finally, put another acrylic ring (part D) on each tube and fix it with washers and screw nuts.